
New Zealand Garden Diary: Mulching With a Truckload of Shredded Trees
The topsoil in our garden isn't very good (that which remains after we lost a lot of it in the landslip in 2017). It is heavy clay on top of loess, which is a glacial wind-blown silt that forms dense pans that plants find hard to get their roots into. So it's needs a lot of improving. As well as compost and bokashi, I am using thick layers of wood chip mulch, which will break down eventually to feed the soil (I was inspired by the woodchip-covered garden, if not the proselytising, in this YouTube video). In the meantime it works to regulate the moisture content of the soil and to keep weeds at bay.

Click to see options for using the image
As I write this, I have packed about 65 bags and moved about two dozen horse buckets of mulch up to the back section. And I haven't finished.


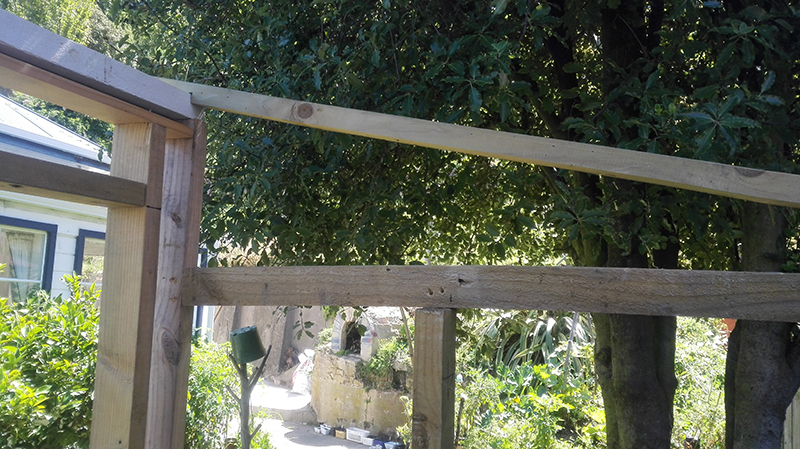
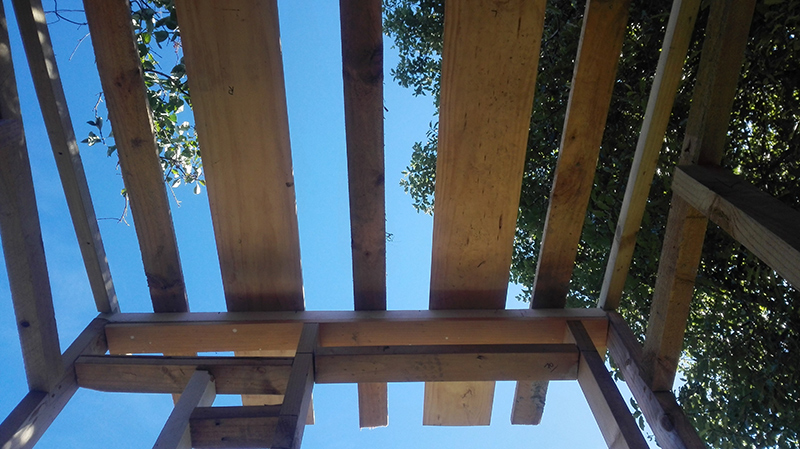
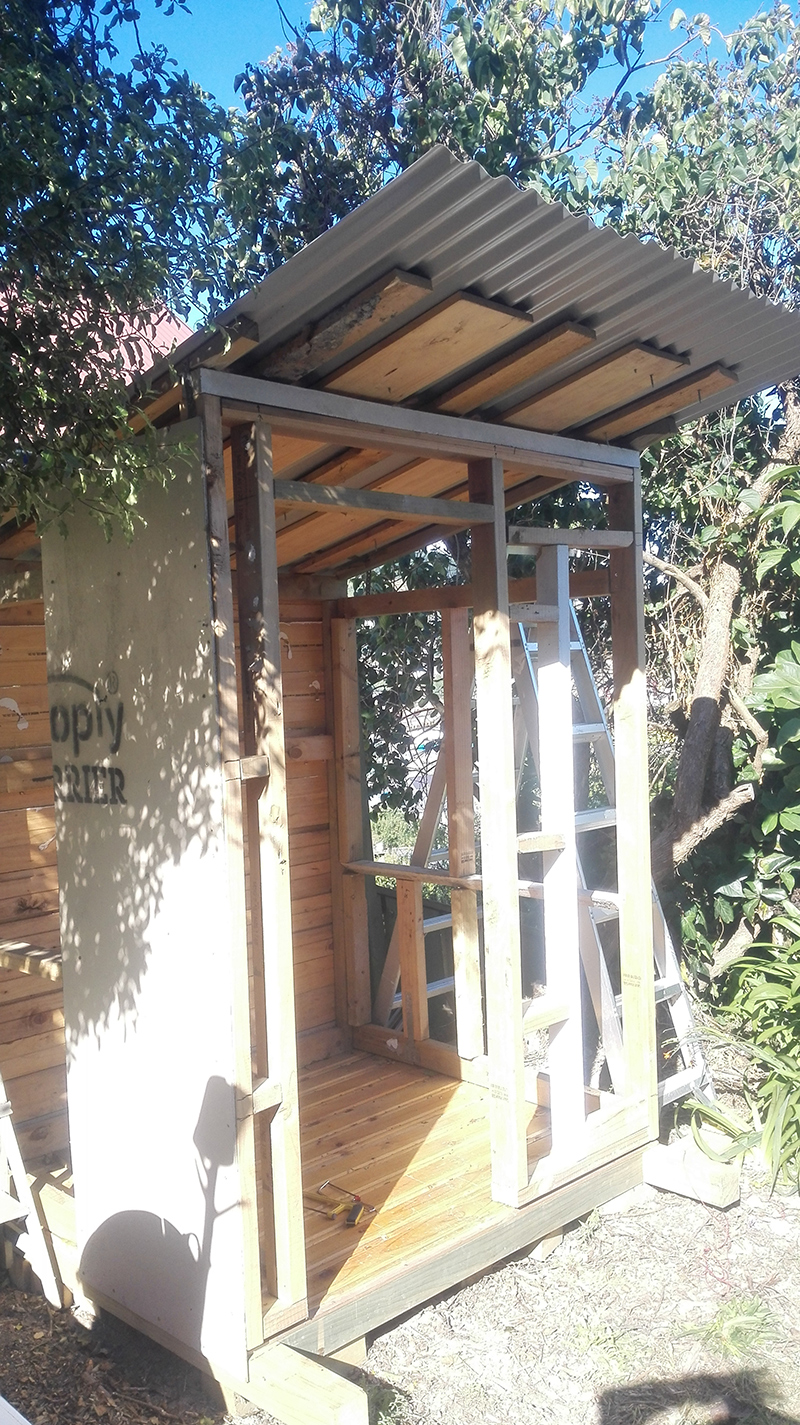
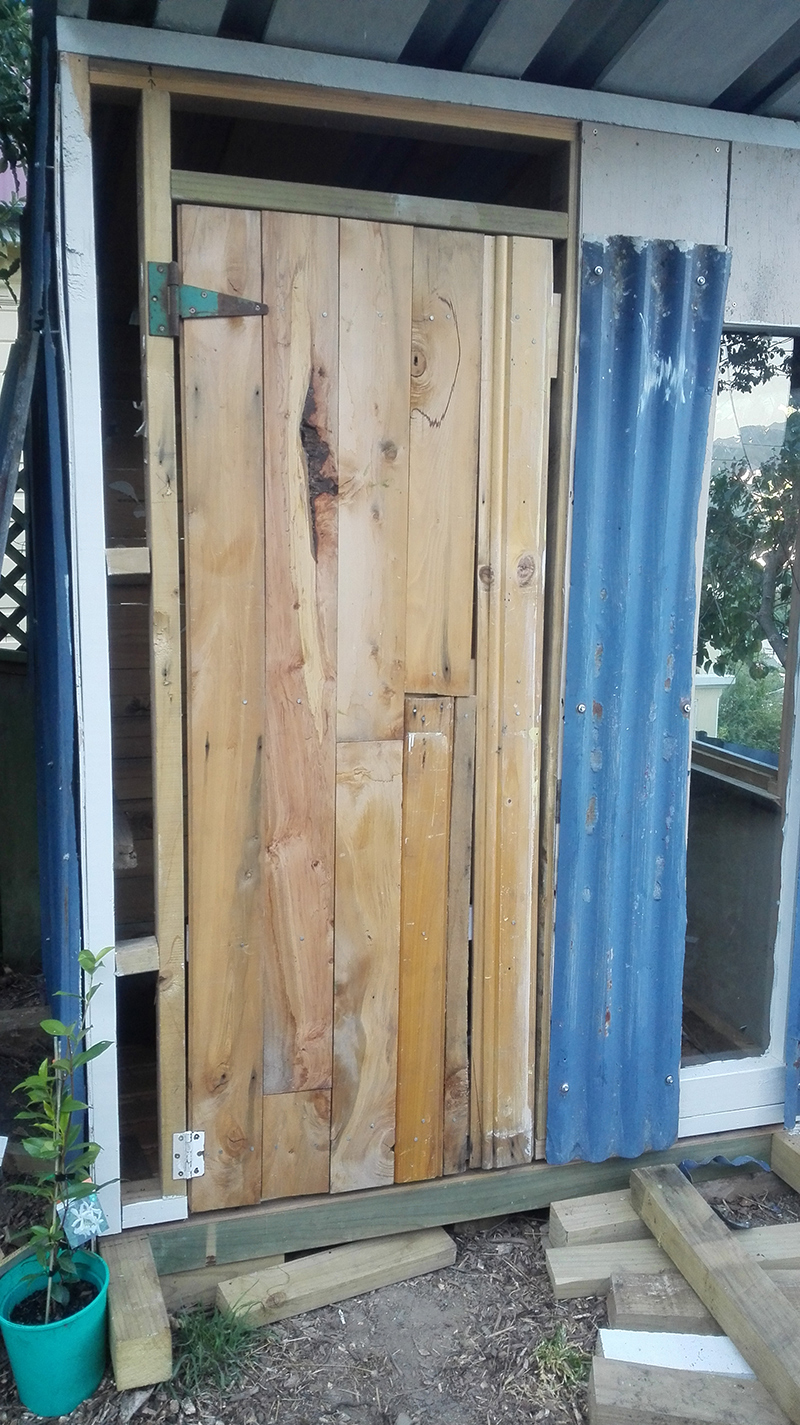
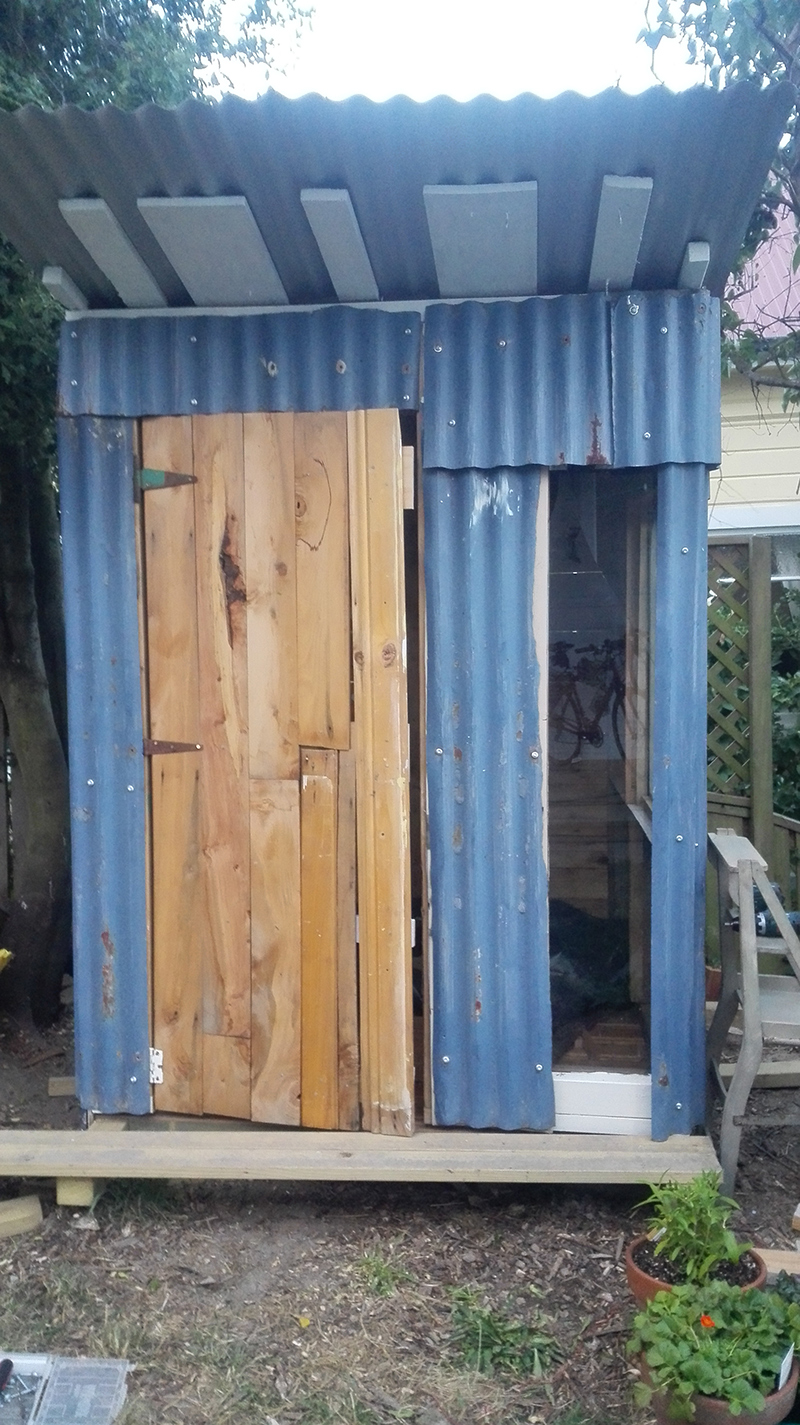
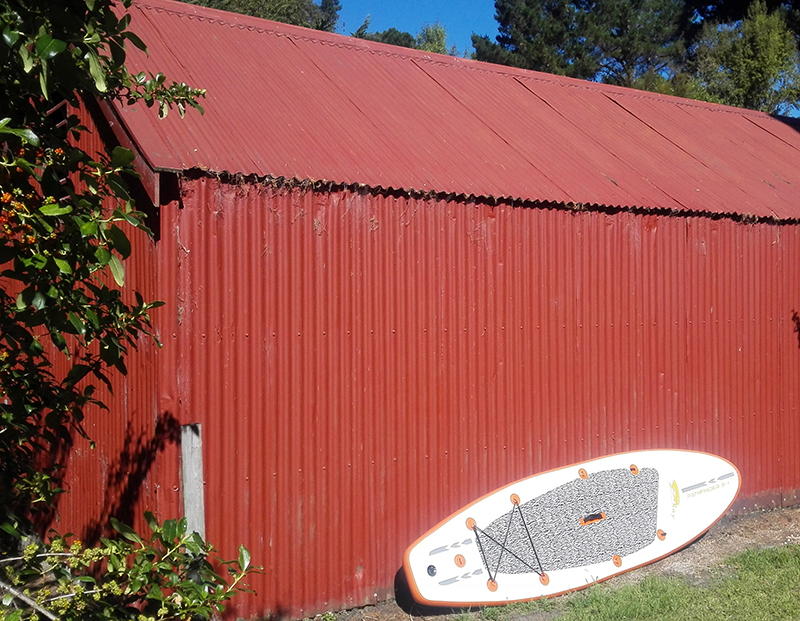
New Zealand Garden Diary: Making a $100 Shed From Recycled Materials With Hand Tools
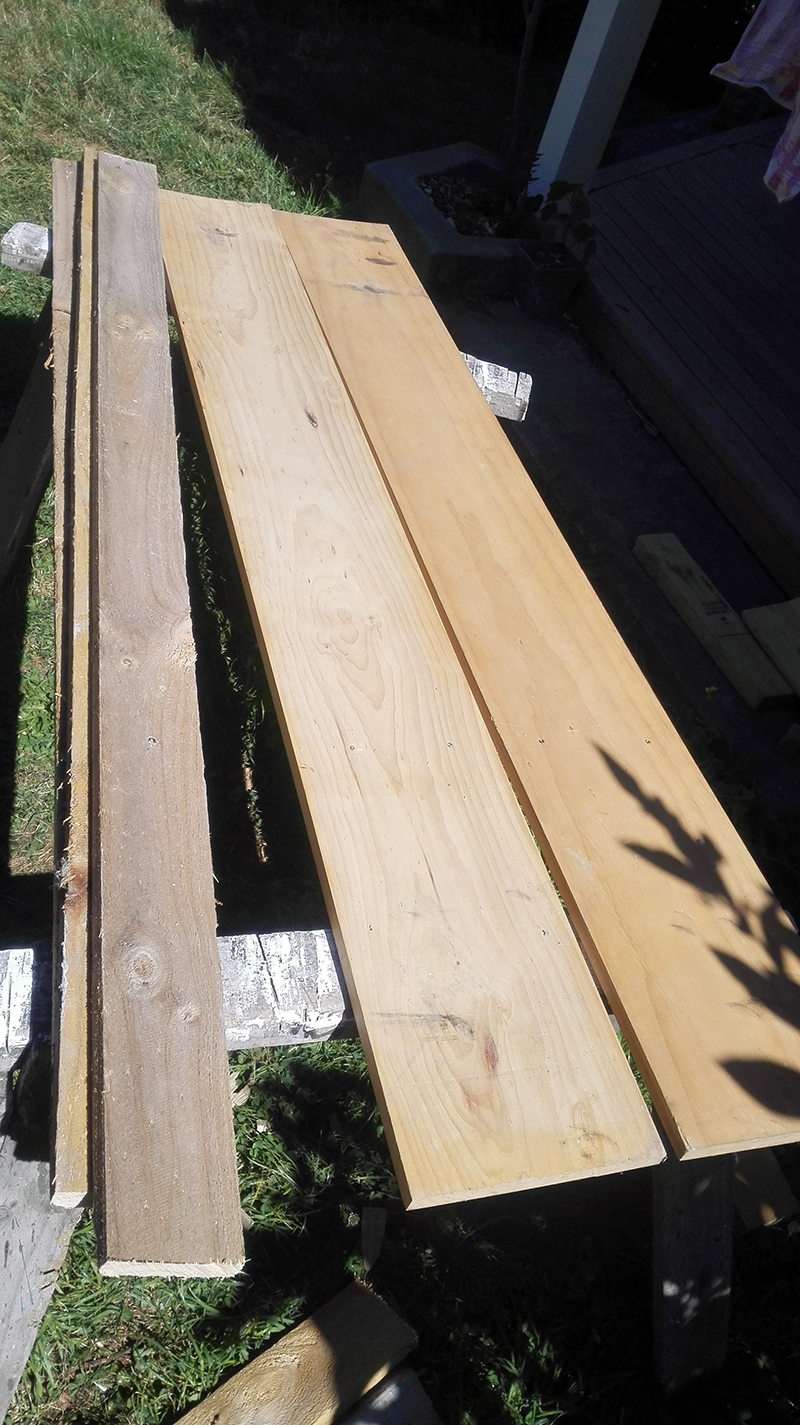
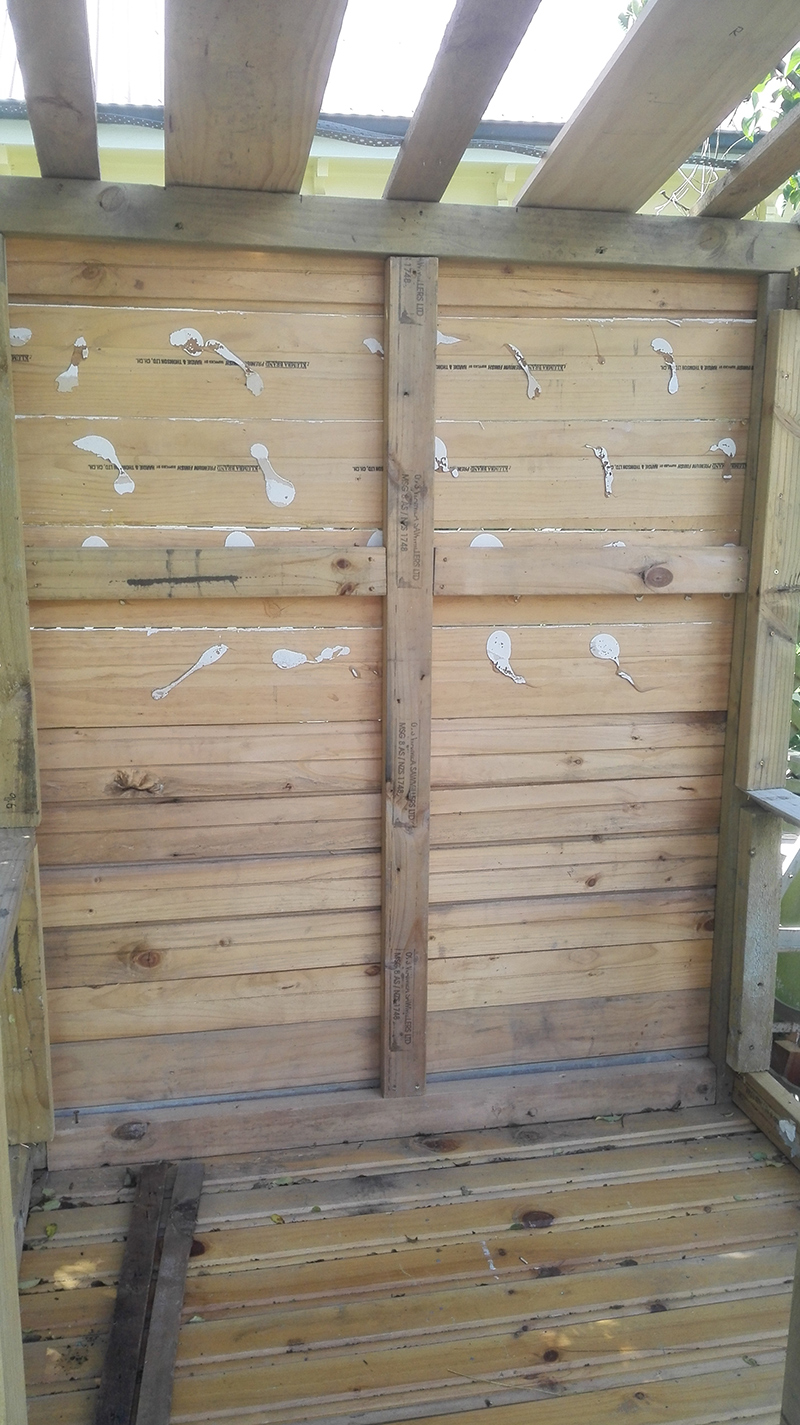
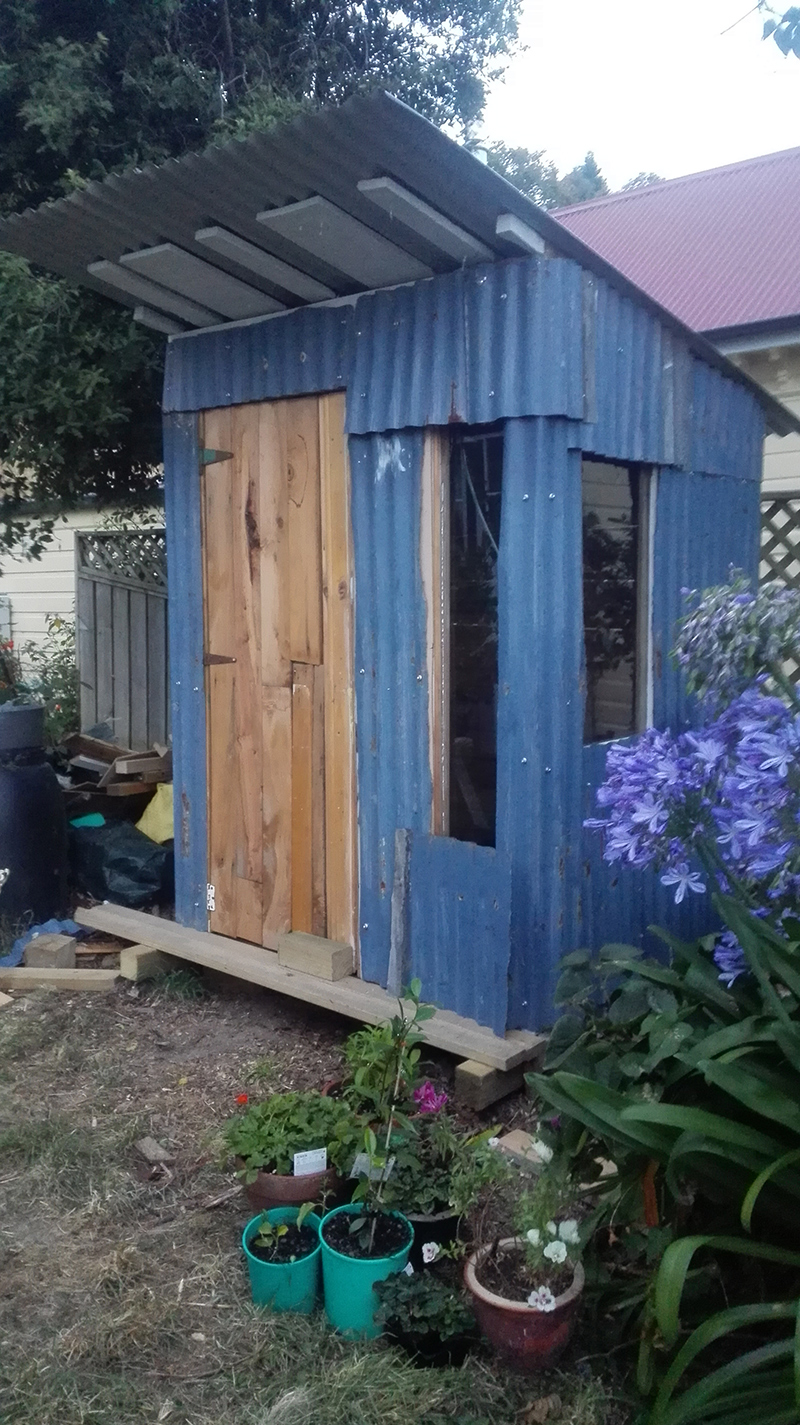
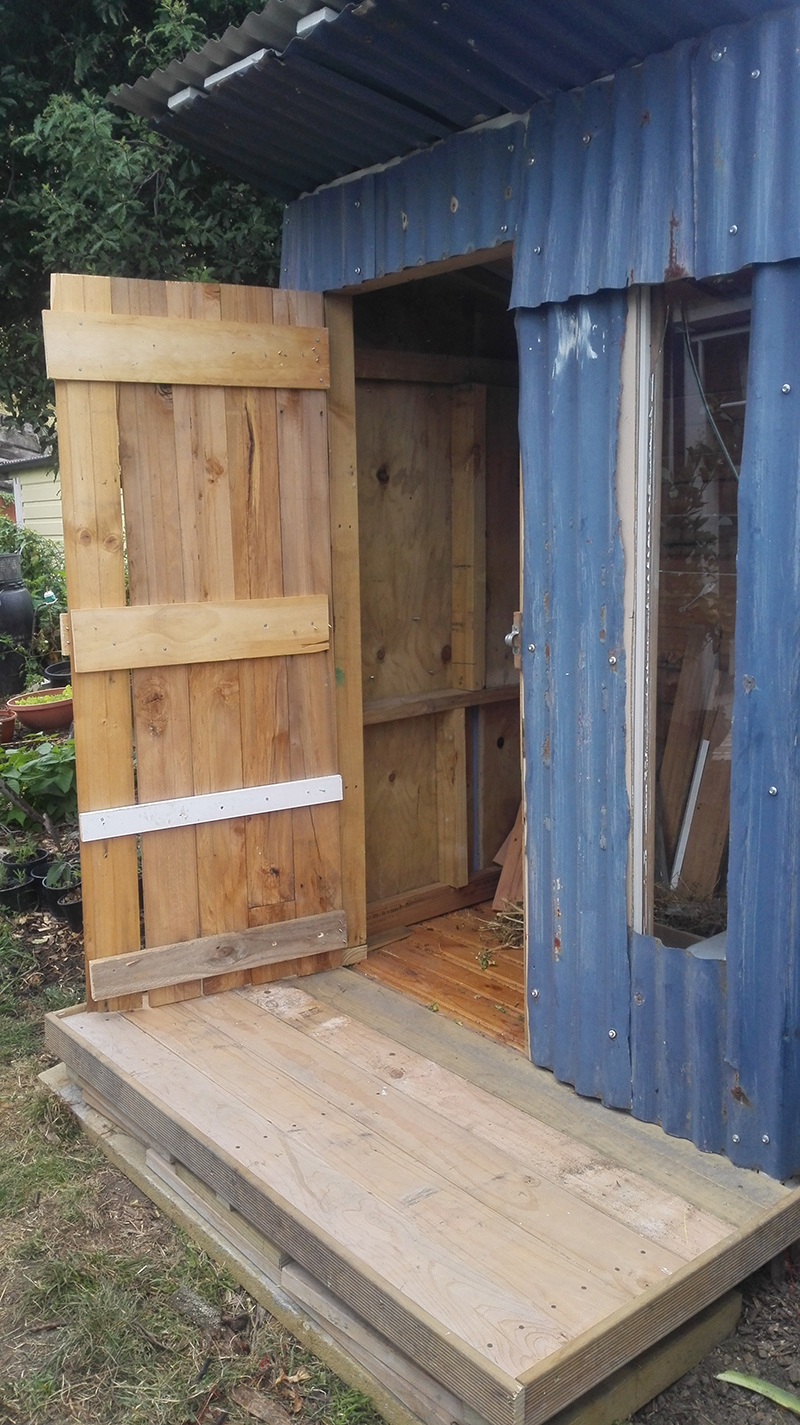
I’ve done it. I’ve (nearly) finished my potting shed. Almost everything has come from the renovations we've done on the house. The wood framing/deck/plywood was leftover from rebuilding the back room, replacing the floor in the bedroom and replacing the veranda. The windows are the ones we replaced when we put in double glazing. The corrugated iron cladding and roof are from when we replaced the veranda roof. I bought old hinges from the eco-shop on Blenheim Road. The only new materials were nails and screws. All up, the shed cost me about $100 in money, but a lot of hours in time.

Click to see options for using the image
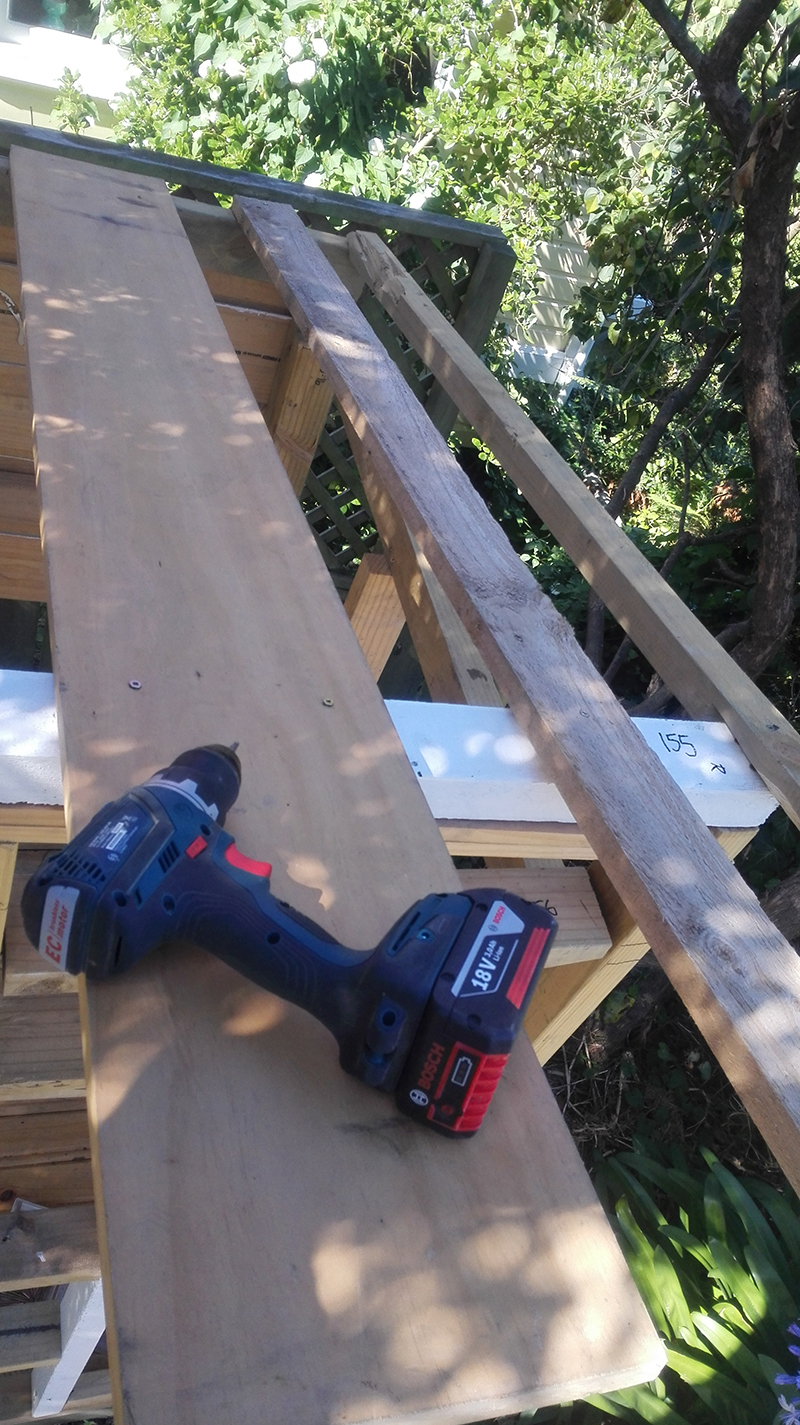
I used an electric drill with various bits (great for putting in screws… and taking them out again), but other than that I only used hand tools: tin snips, handsaw, chisel, hammer, crowbar (to remove the roofing nails when I had to rejig the roof).

The potting shed was inspired by Monty Don’s one in Gardener’s World
I read a book about building treehouses (How to Build Treehouses, Huts and Forts ) and watched a lot of YouTube videos to work out how to go about it (eg. this one and a bunch from My Self Reliance). Then I drew some plans to scale. They were more or less what I followed for the framing of the shed before I cut and attached the corrugated iron.
You can see my hand-drawn plans here and the following galleries show a step by step of how I did it.
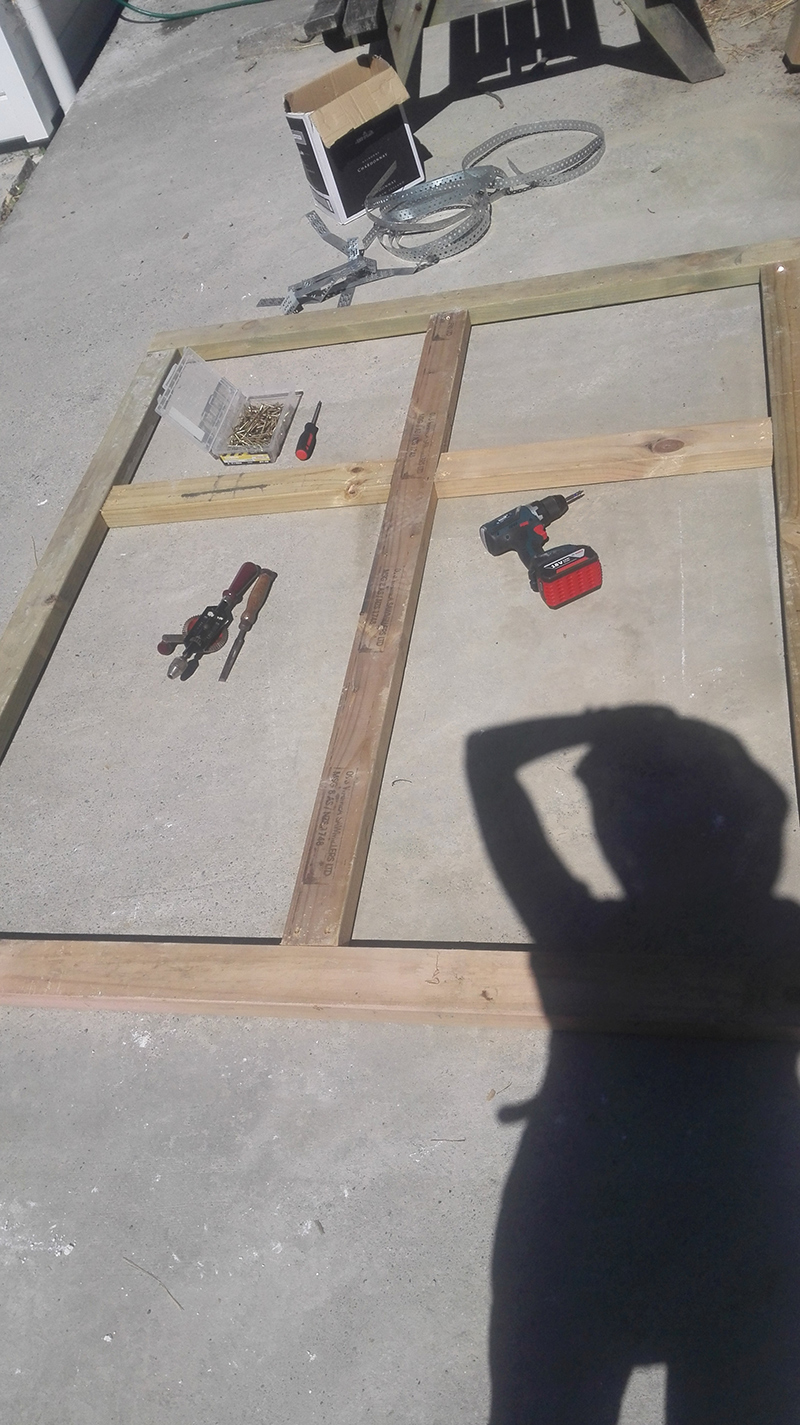
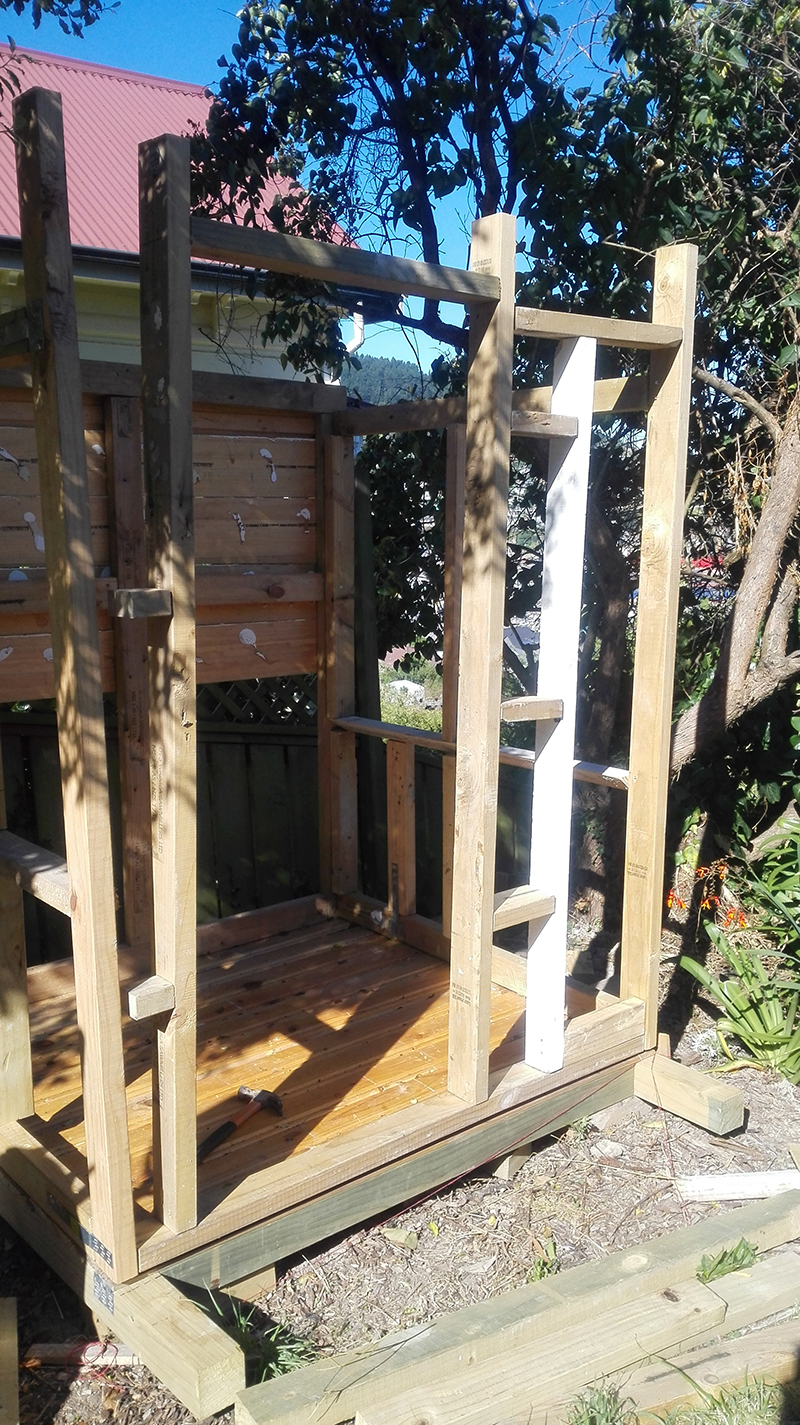
Leveling (ahem!) and putting in treated wood as a foundation of sorts before laying board

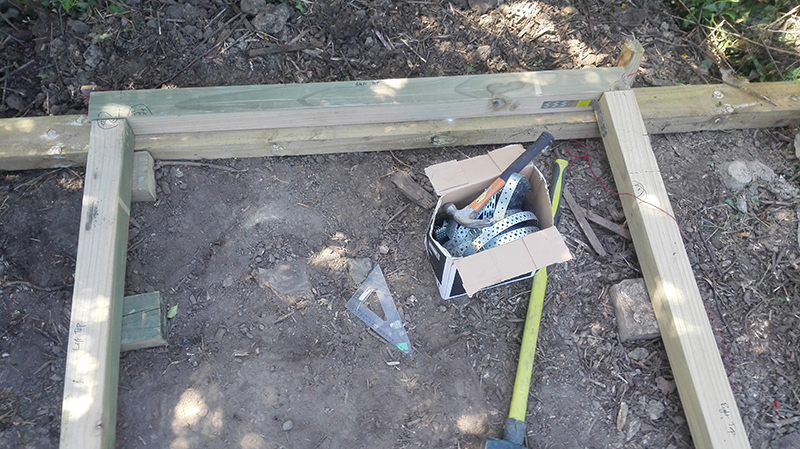
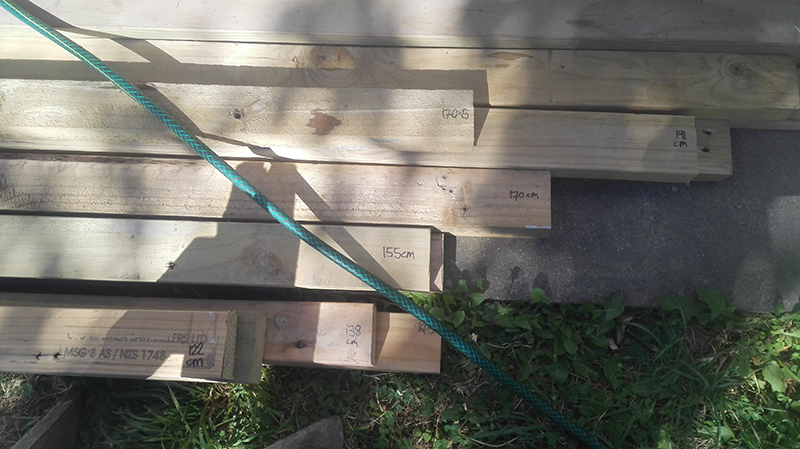
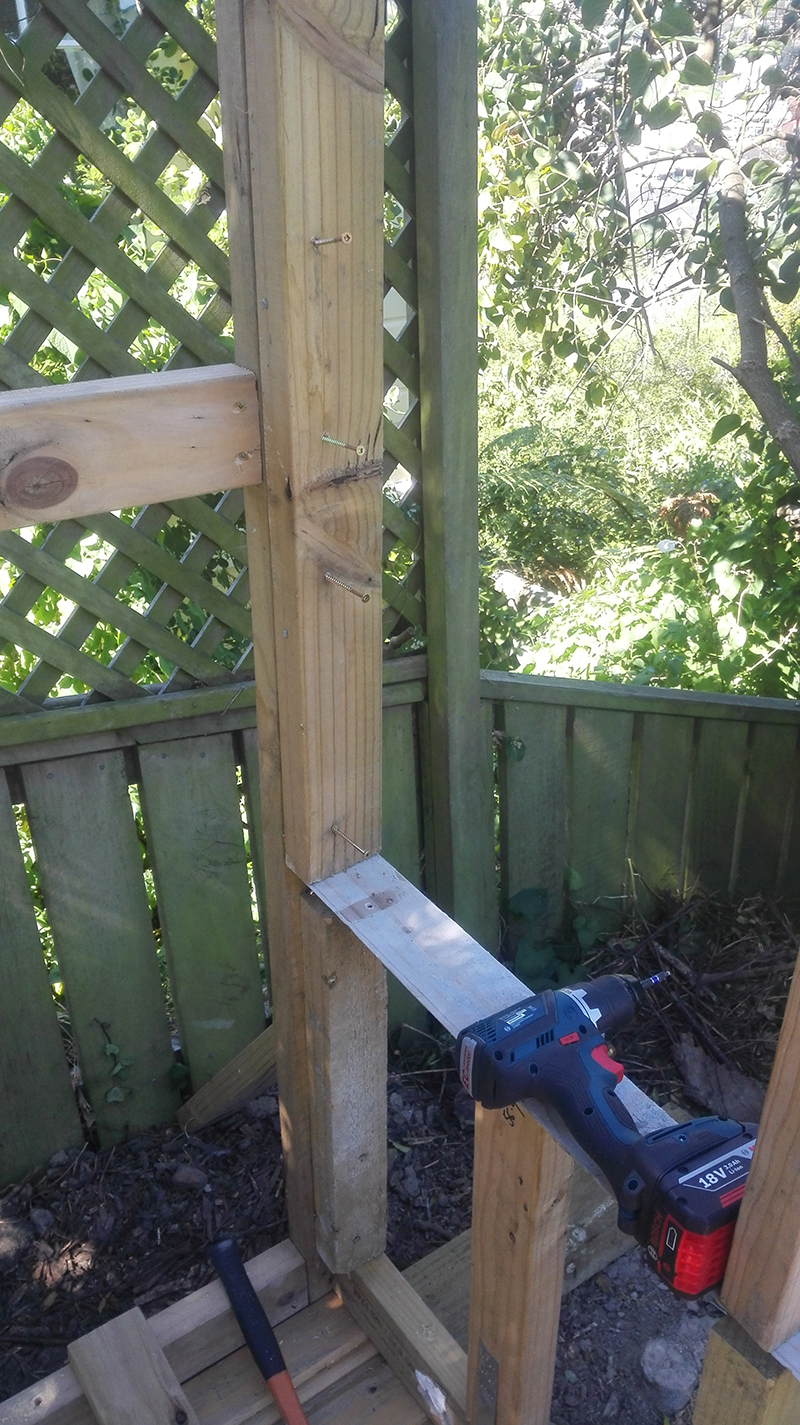
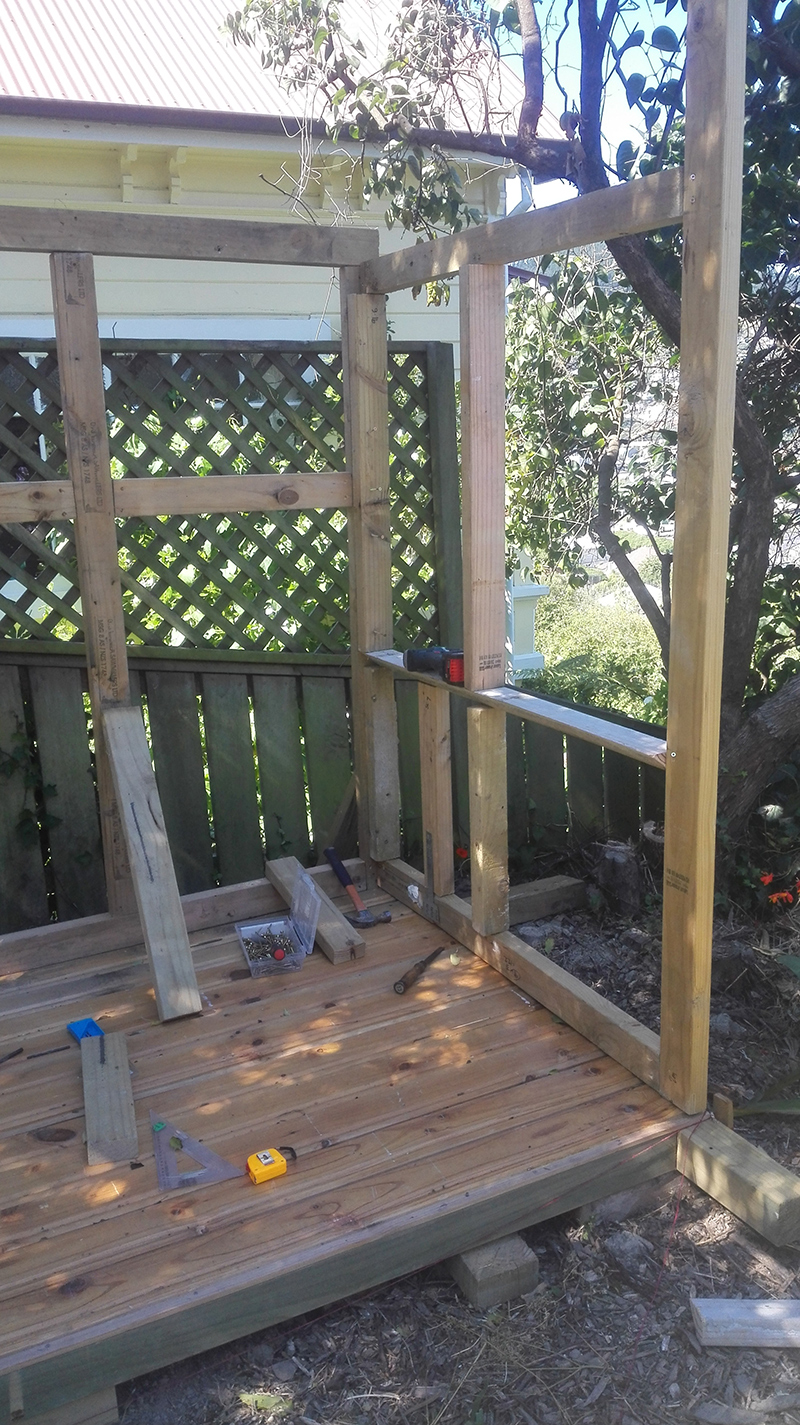
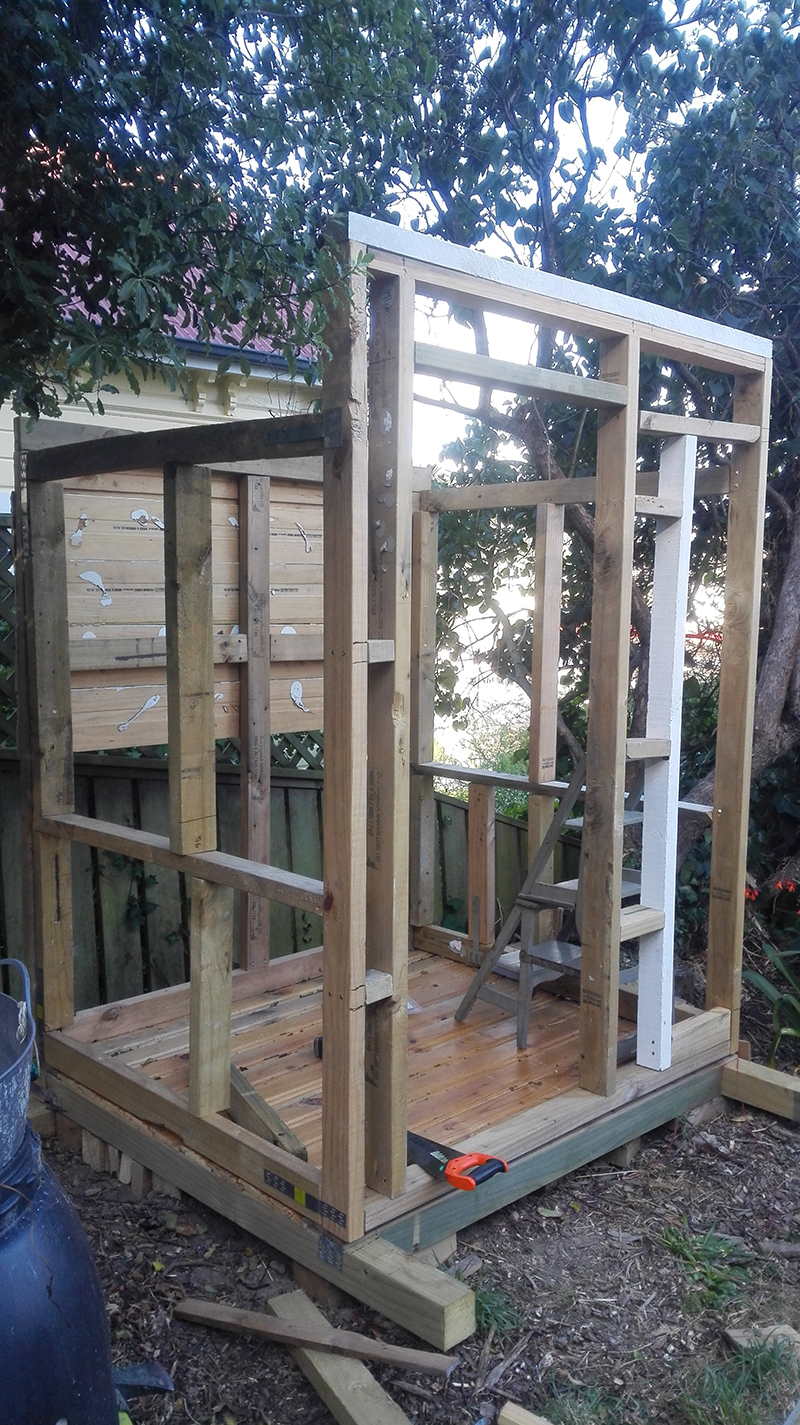
Measuring, sawing and screwing together the wood for the framing
I pre-drilled holes in the hard wood (pine was fine, though I used a chisel to allow the heads to be sunk). Screws are stronger and mean the shed can be taken apart.
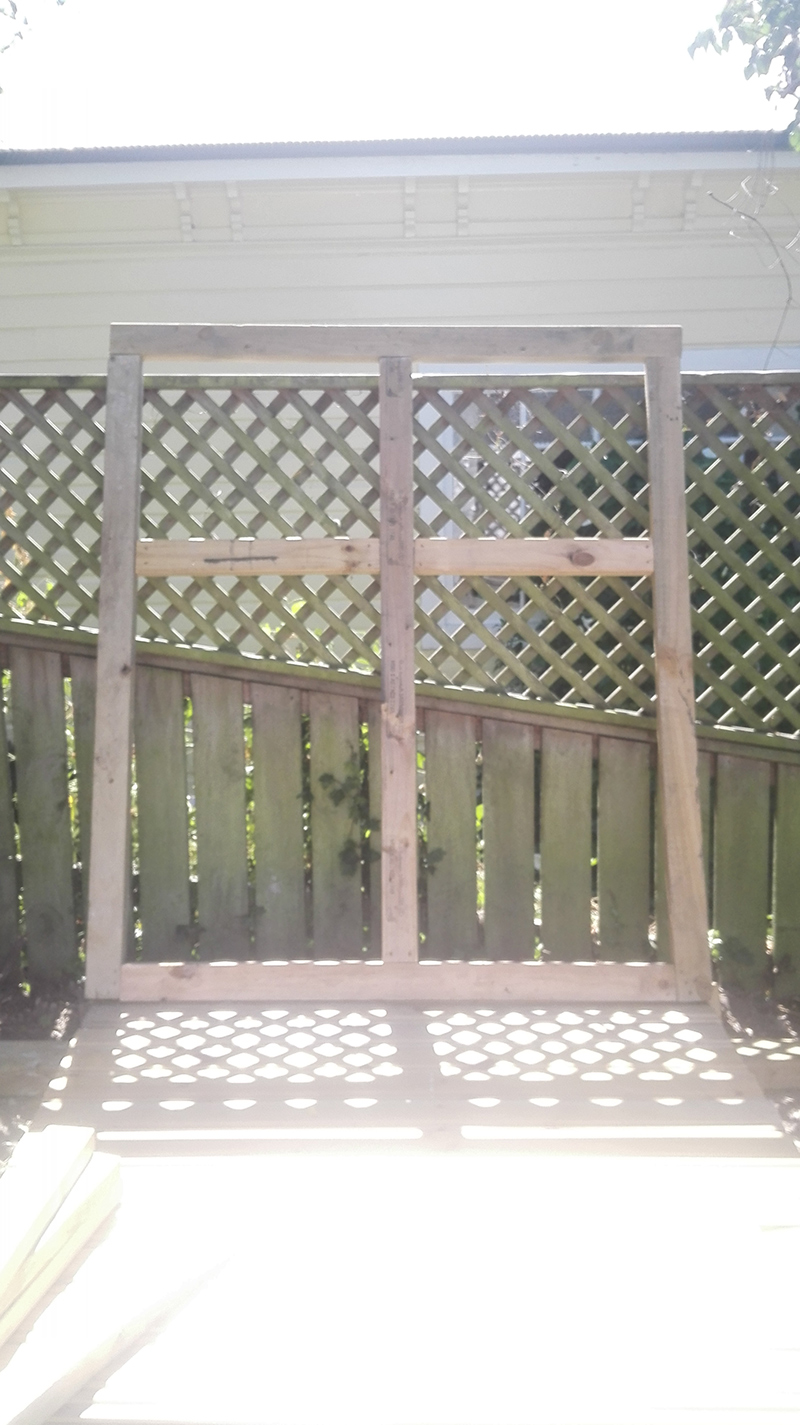

Attaching boards to the rear of the frame and putting on the front frame
I used the old wall panelling for the back of the shed that won’t be seen. I’ll need to paint it with weatherproof paint.
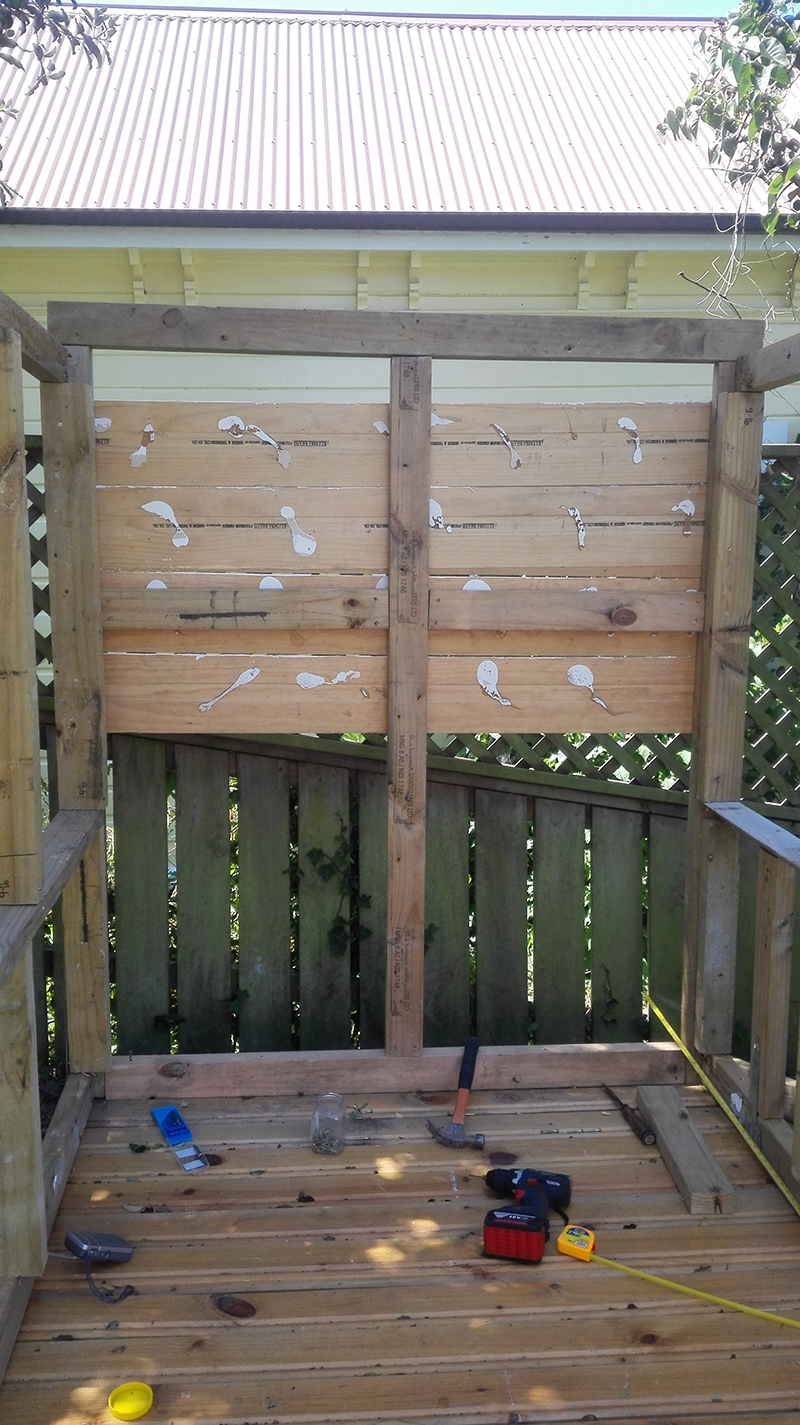
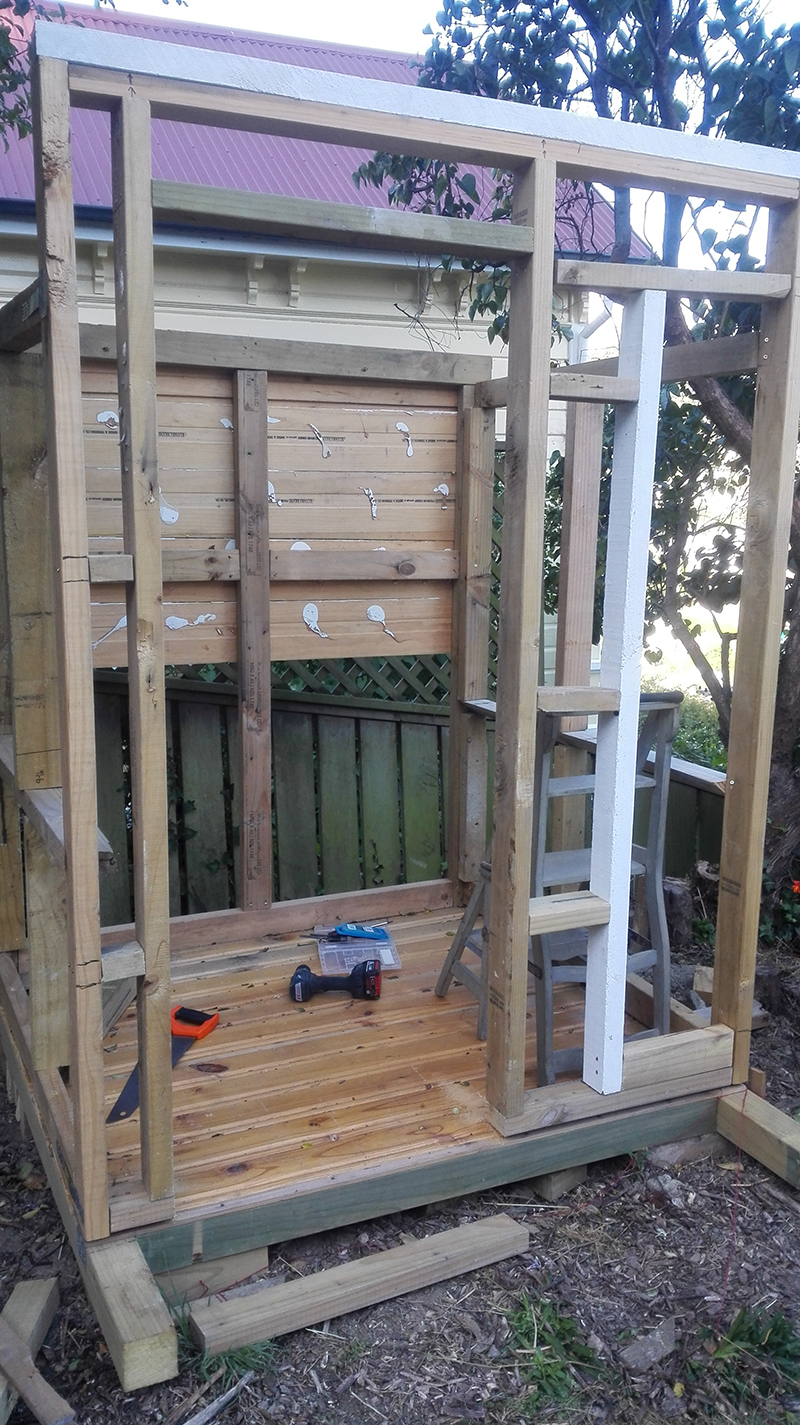
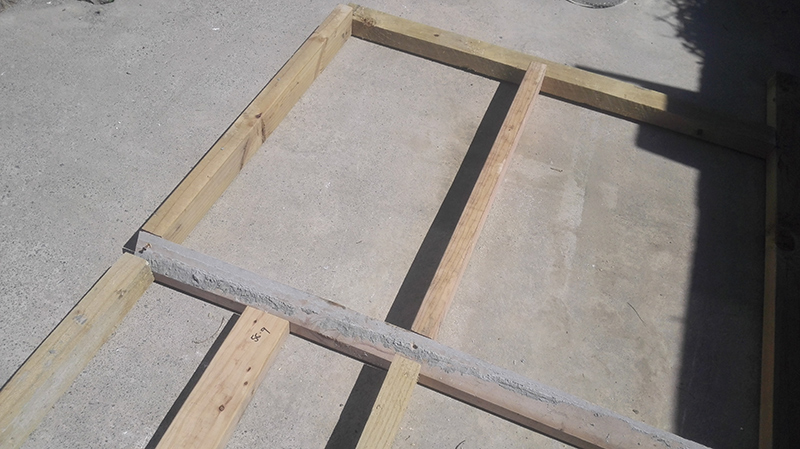
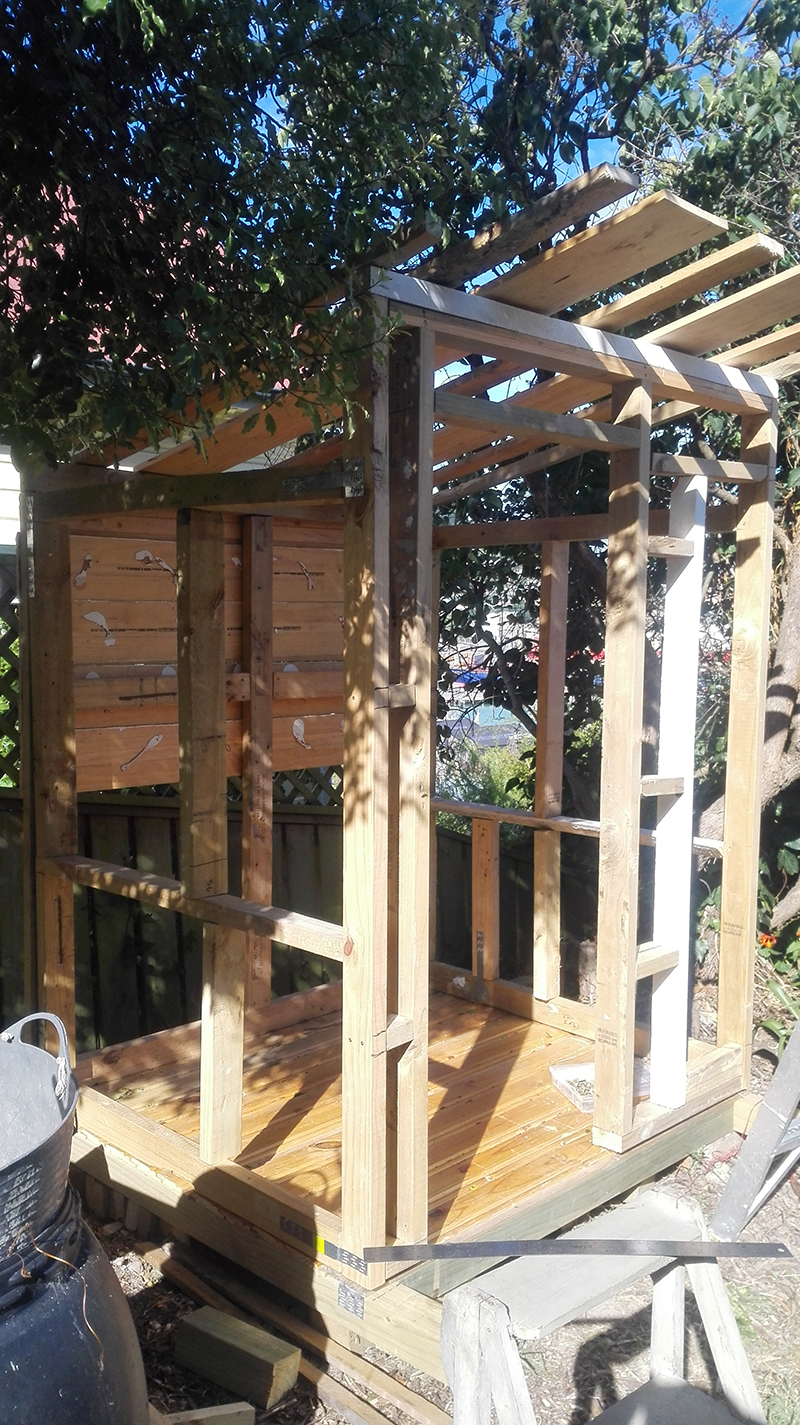
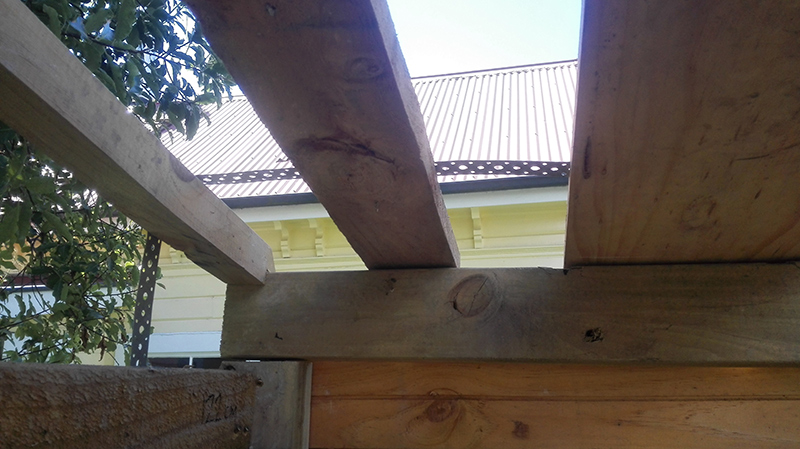
Putting on joists for the roof
I chiselled out notches on the joists at the side of the shed, but just laid the other boards on top.
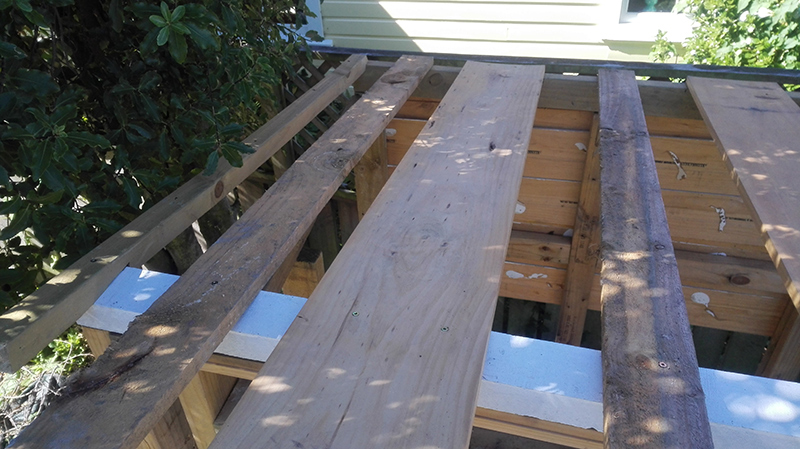
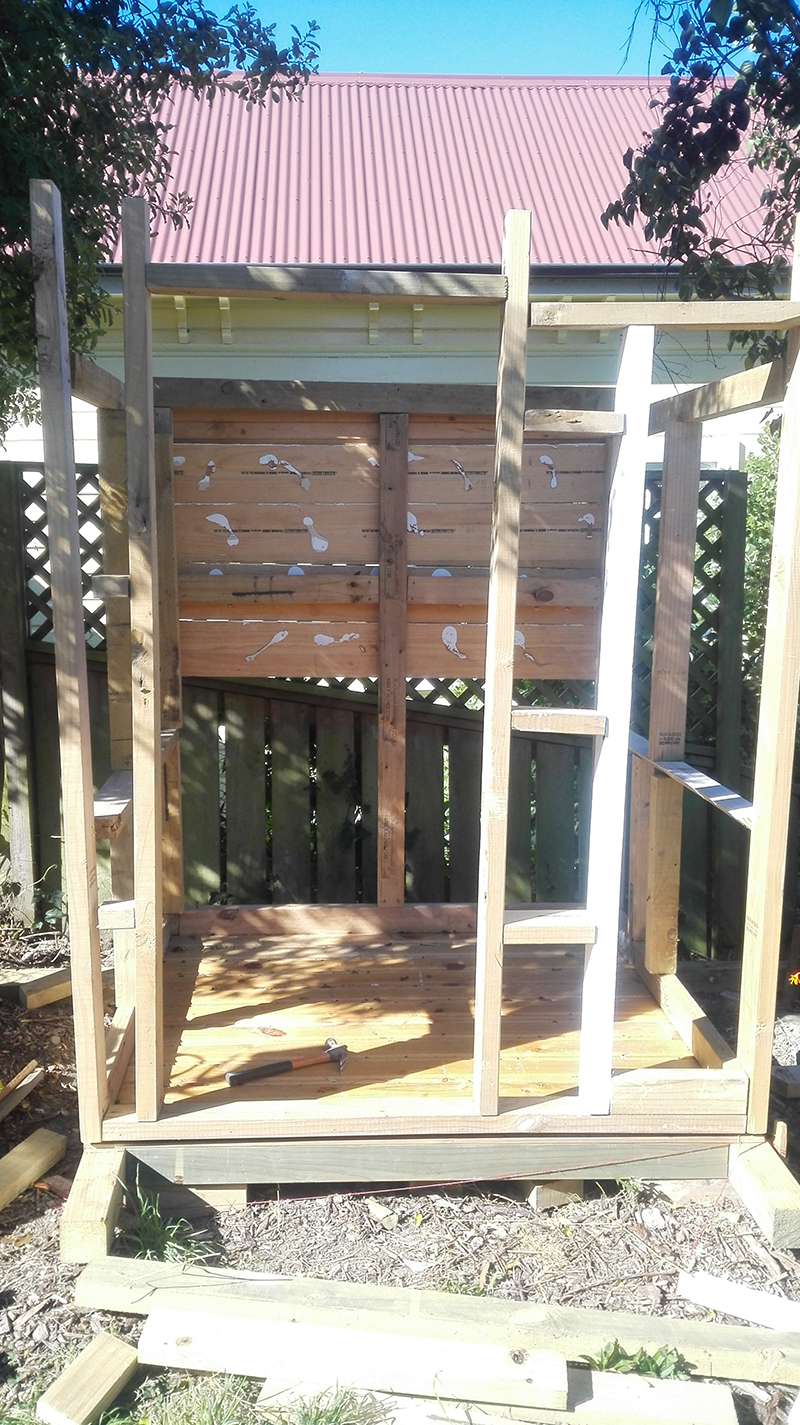
Putting on structural ply and finishing back wall
I started sawing to size and putting on the plywood that the corrugated iron would be attached to. It makes the shed stronger and makes it easier to screw in the tin.

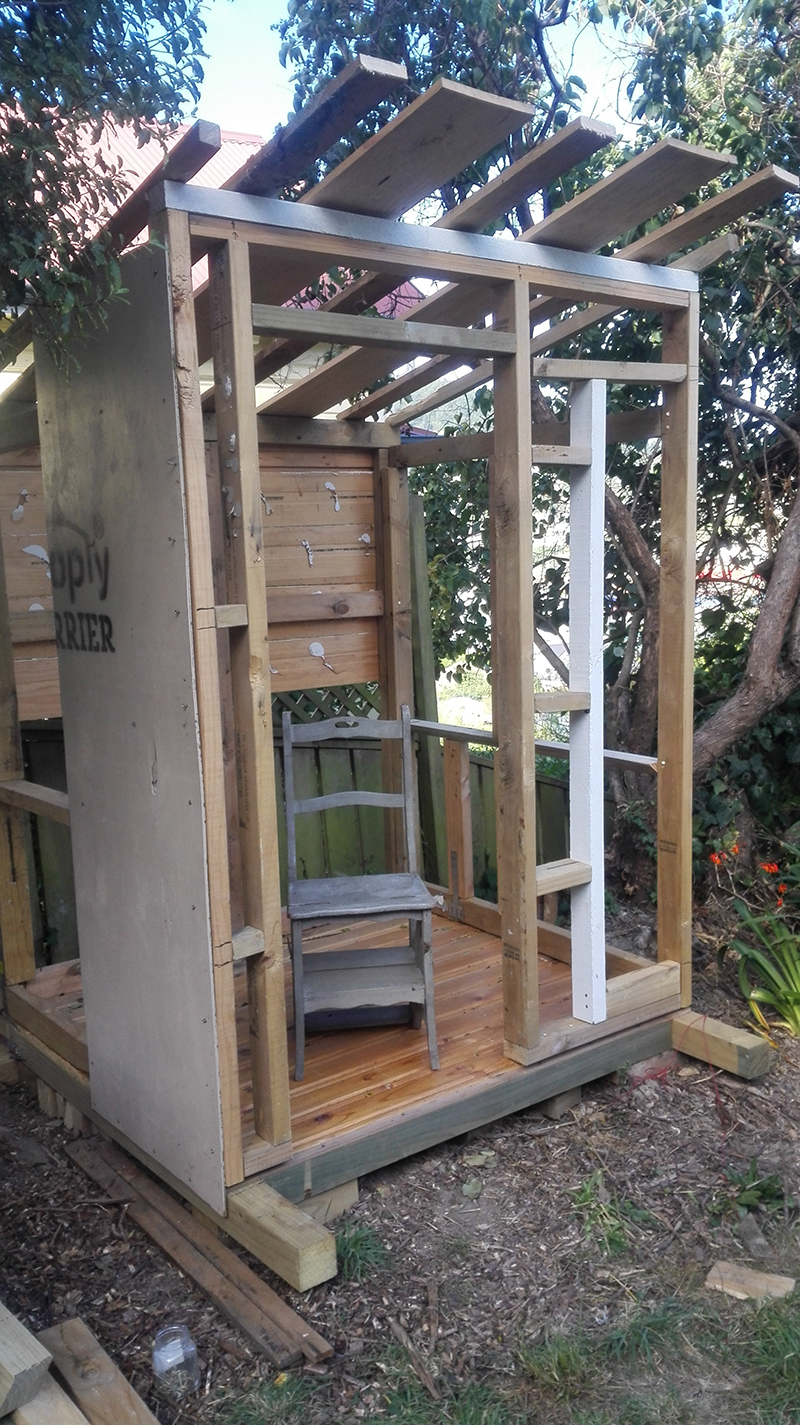
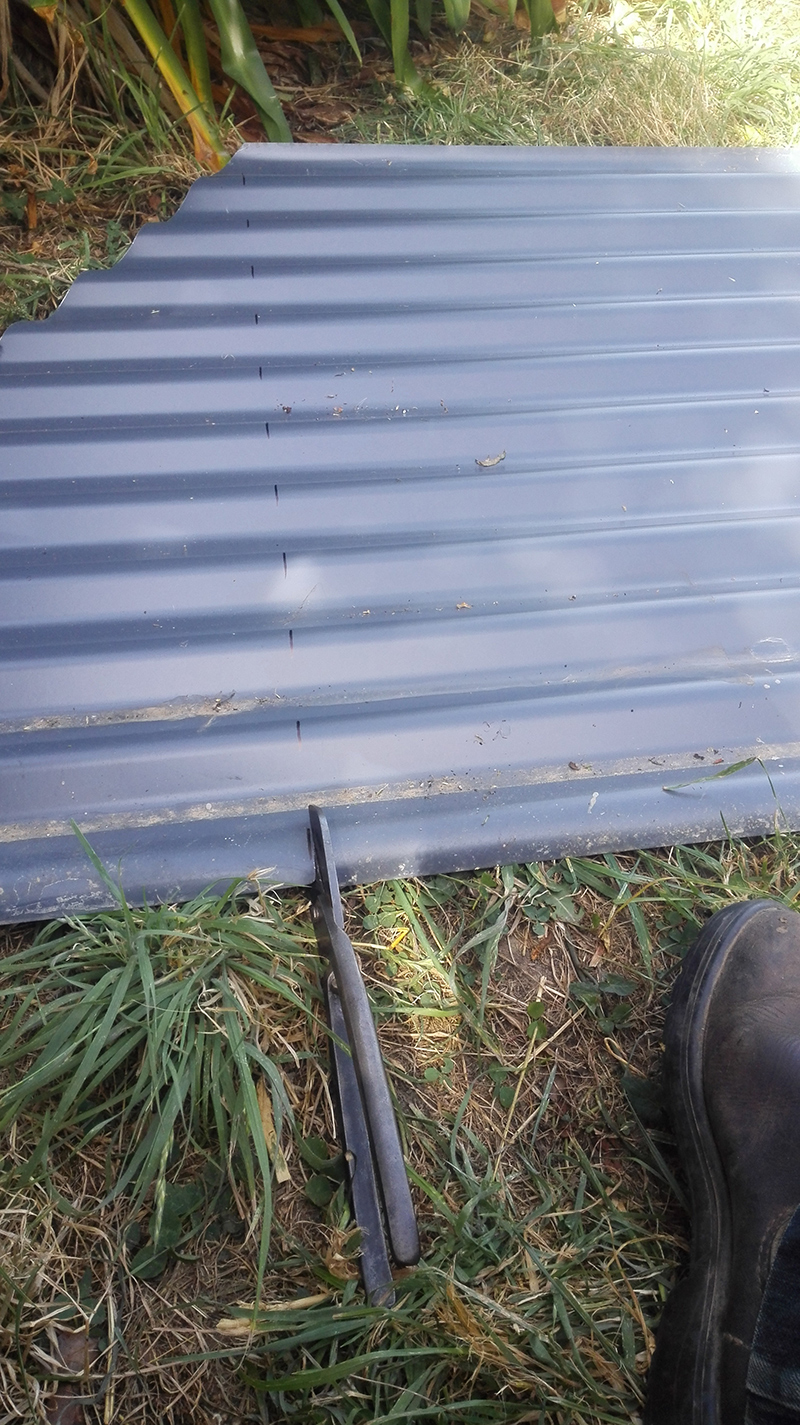
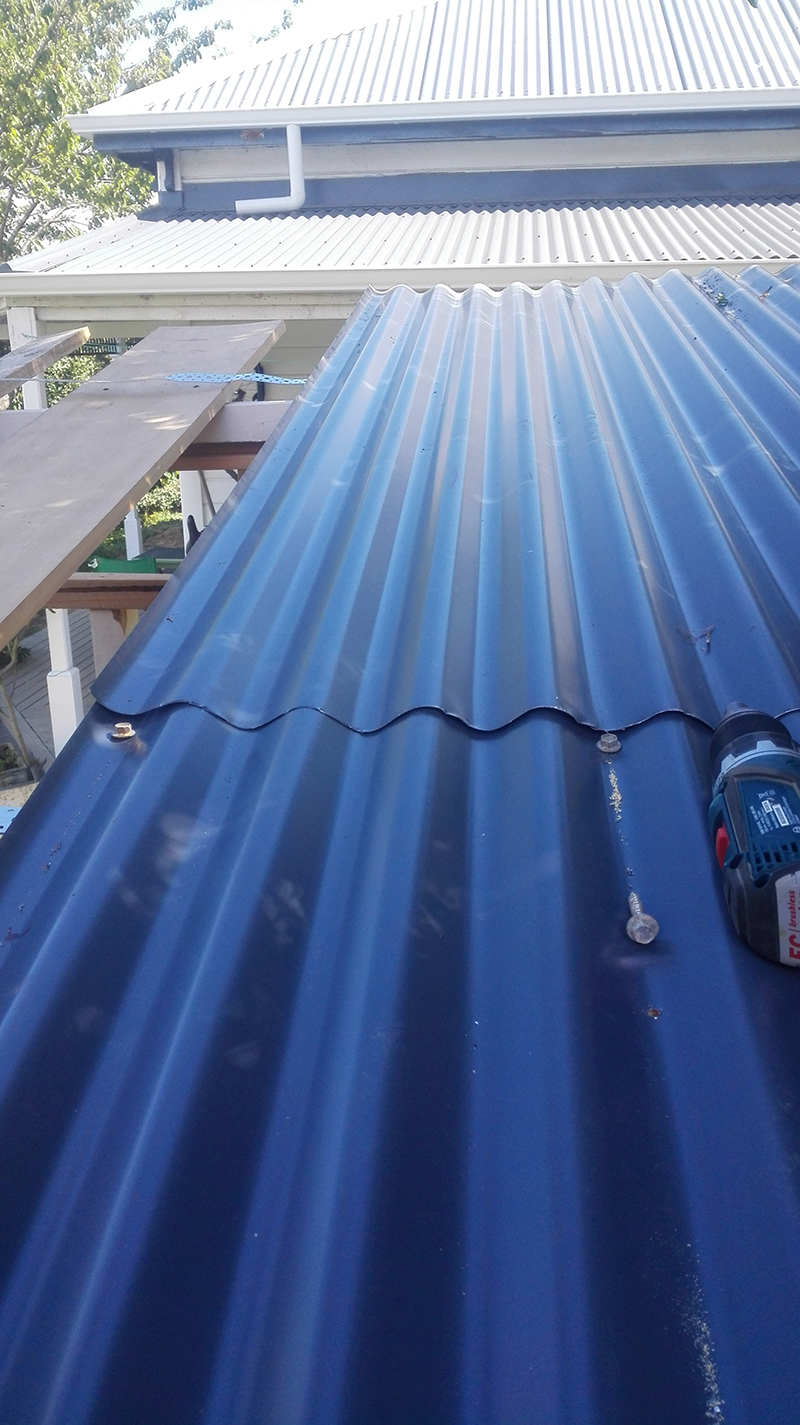
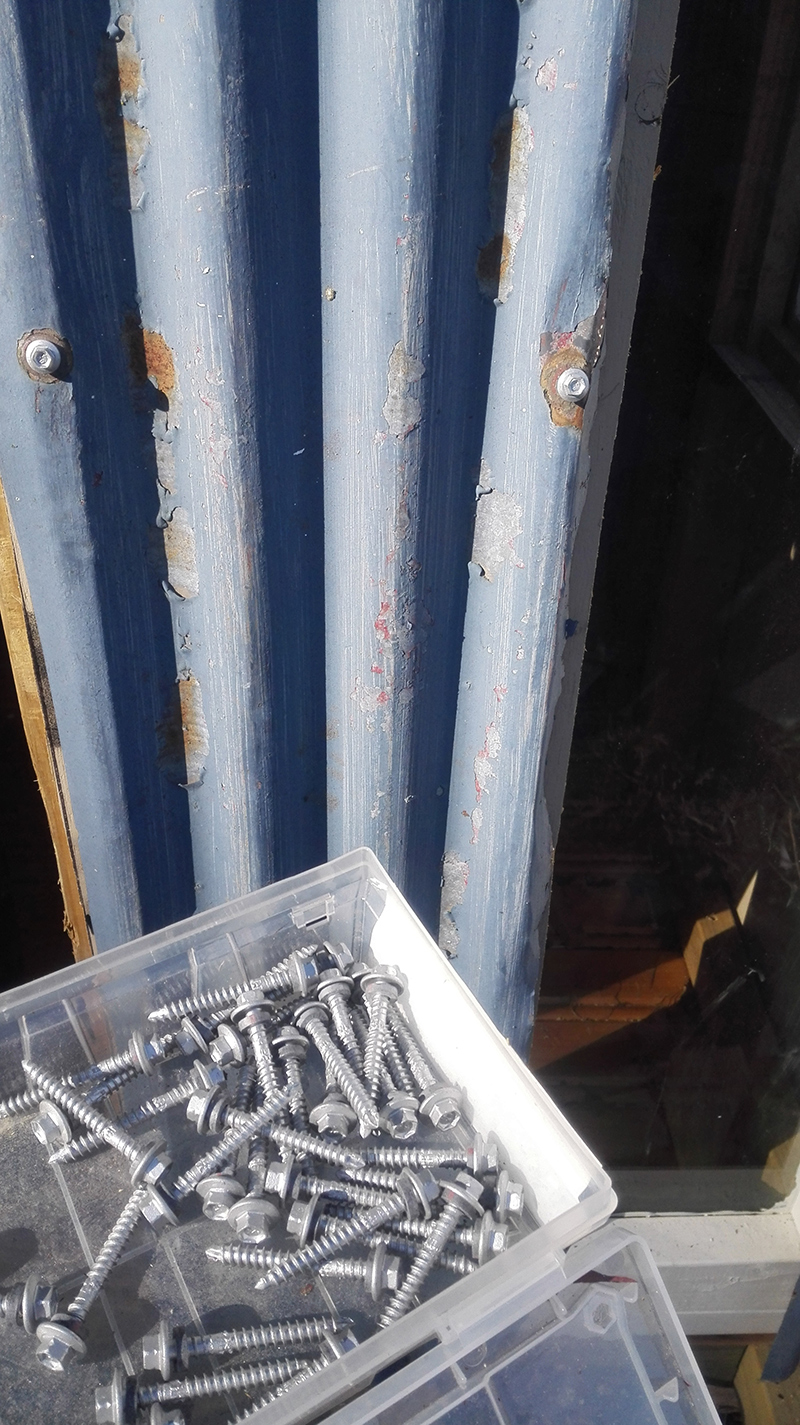
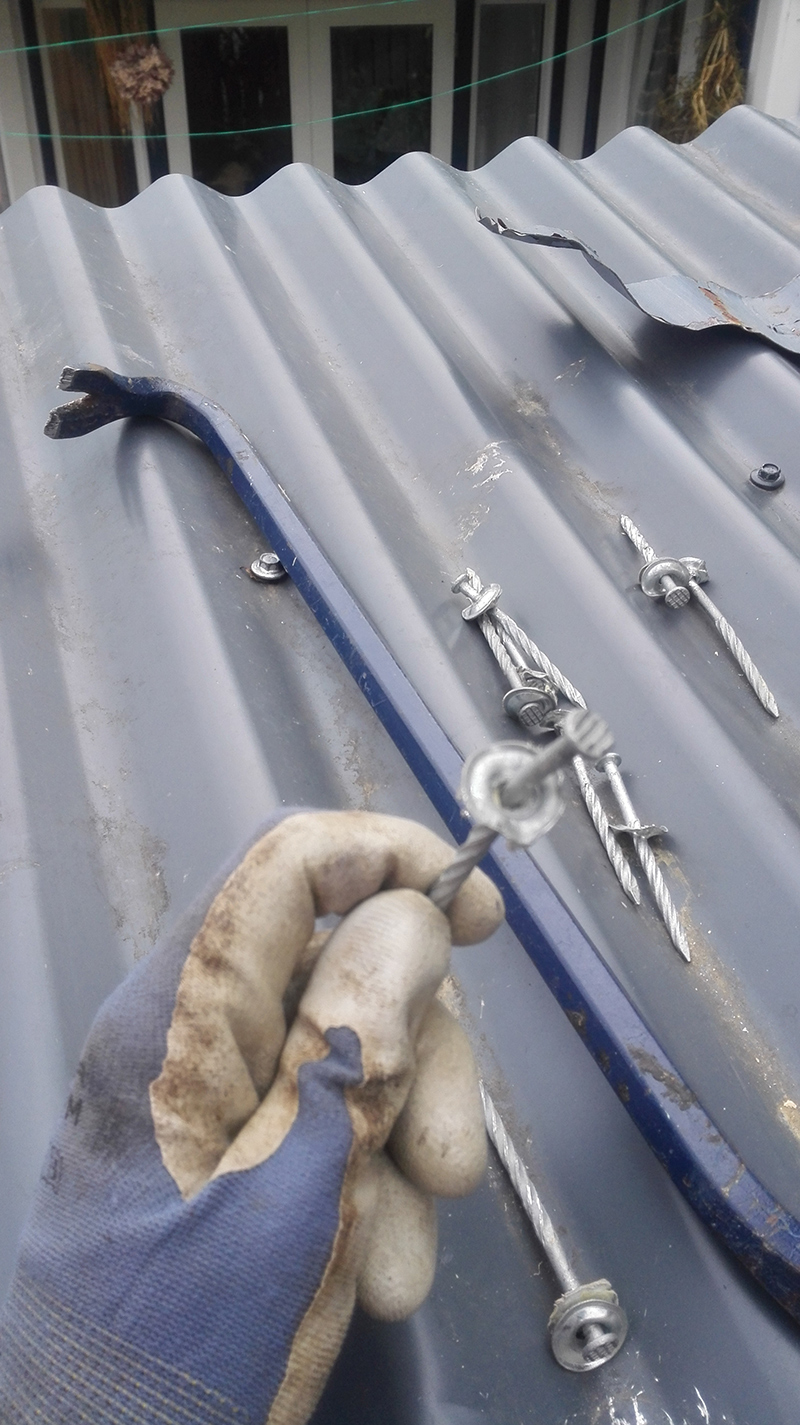
Cutting tin and attaching it to roof joists
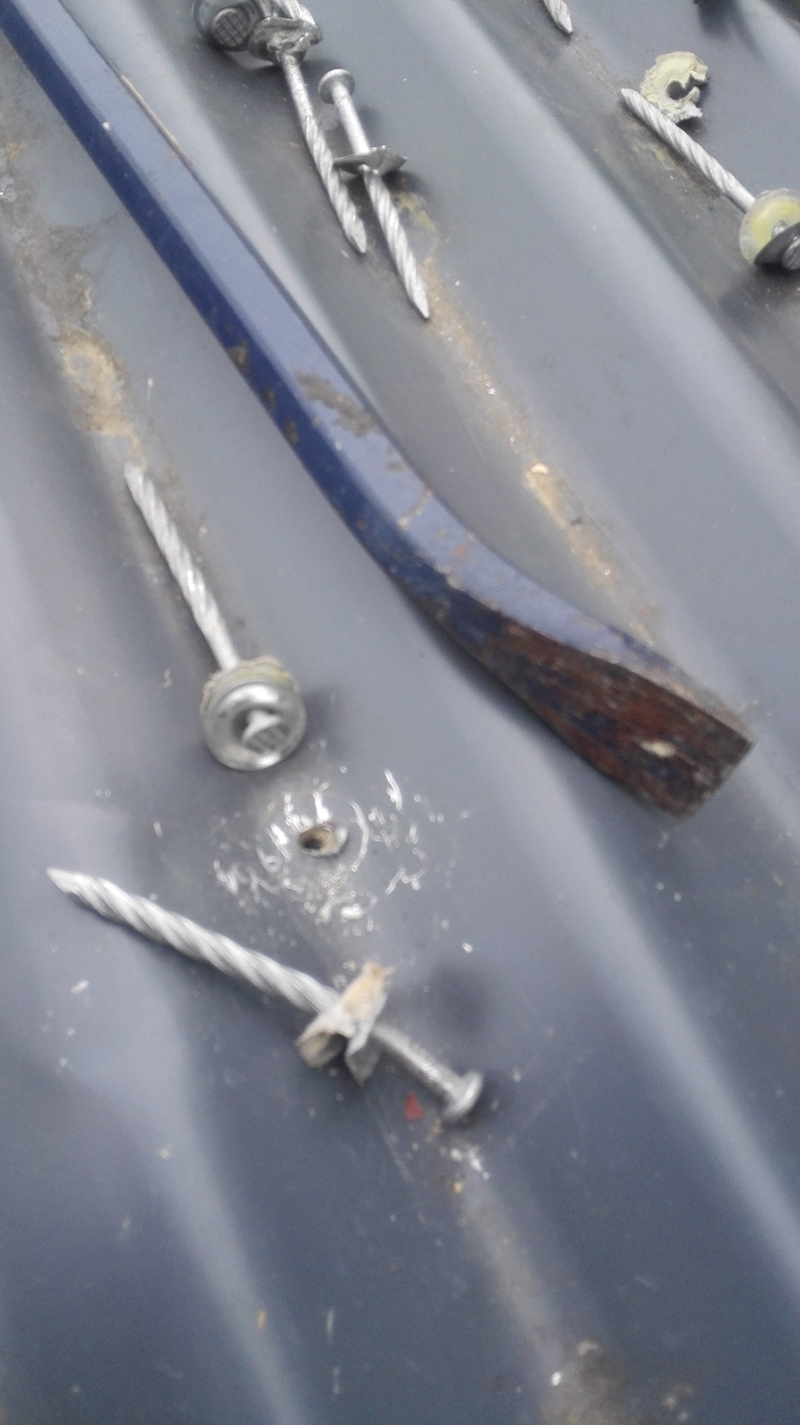
I bought some vintage tin snips on TradeMe and cut the iron by hand. It was hard work and perhaps new tin snips would have been better! I discovered later it is so much better to use hex bolt roof screws, as getting roof nails out of a roof with a screwdriver, hammer and crowbar is bloomin’ hard work.
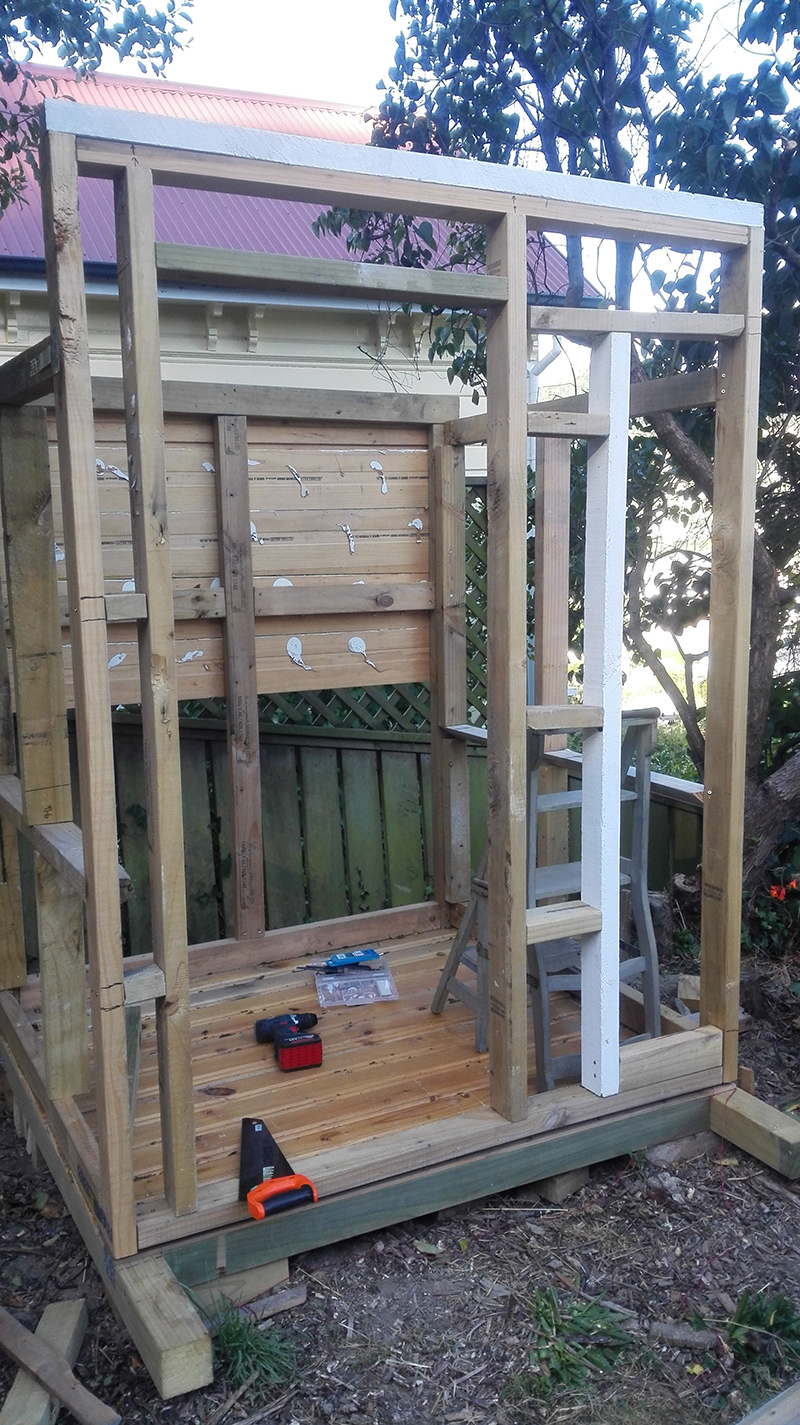
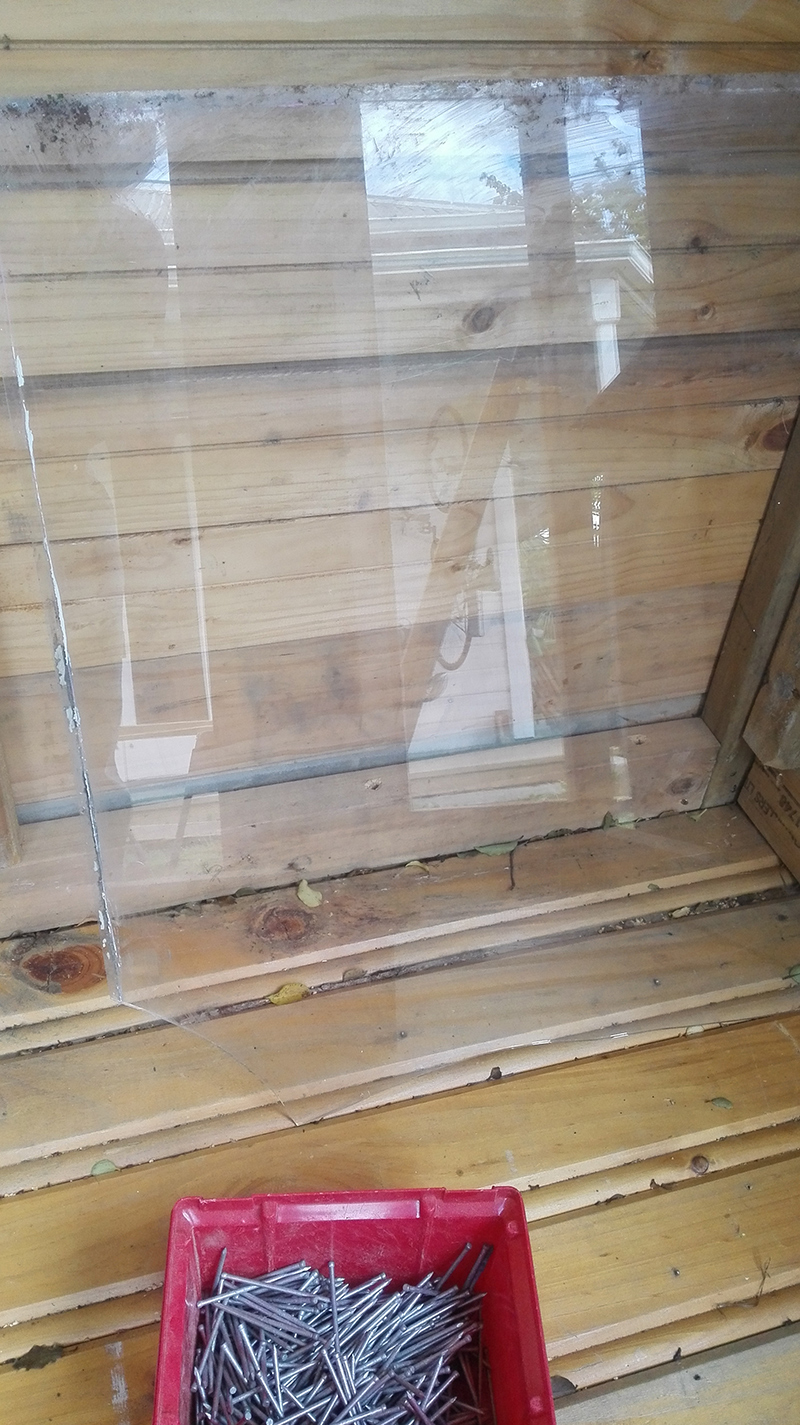
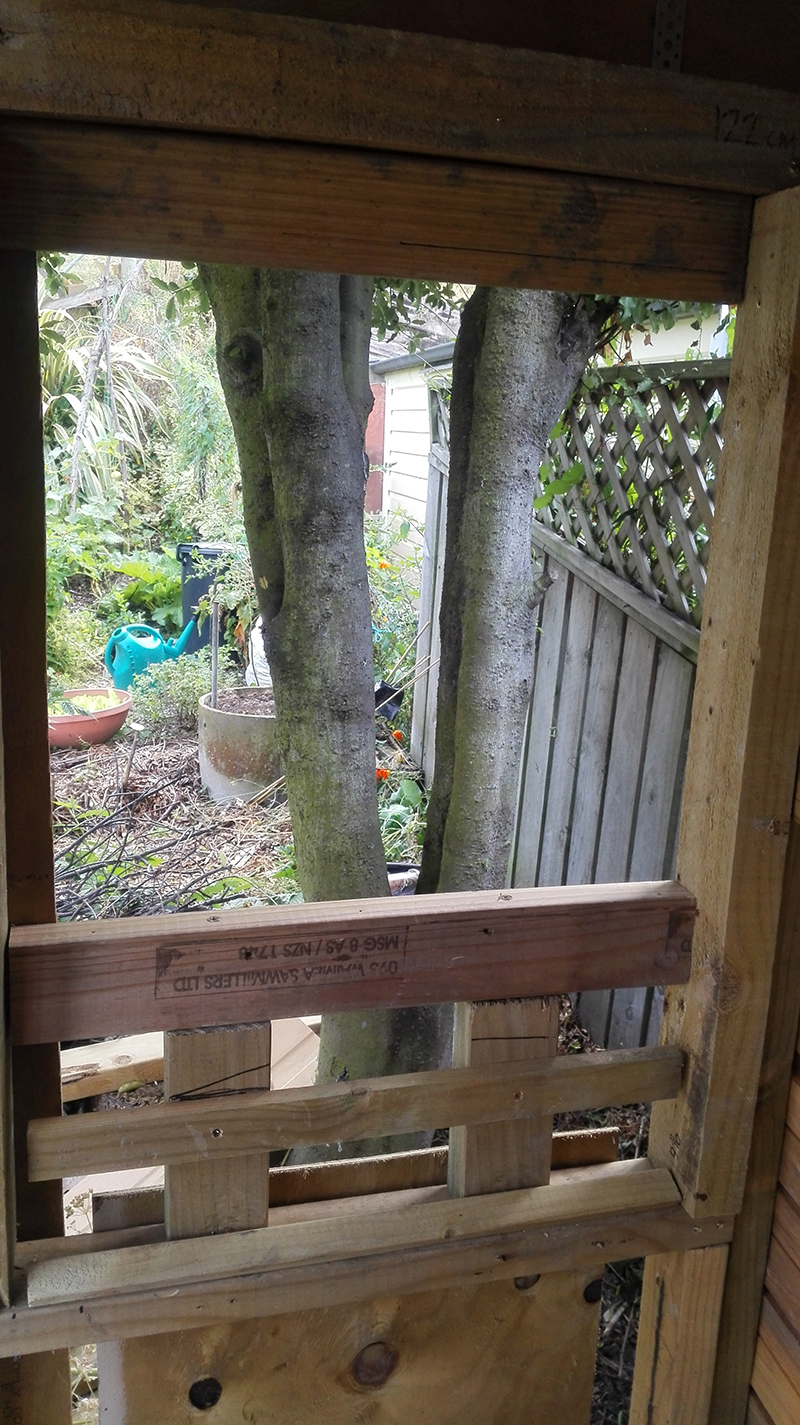
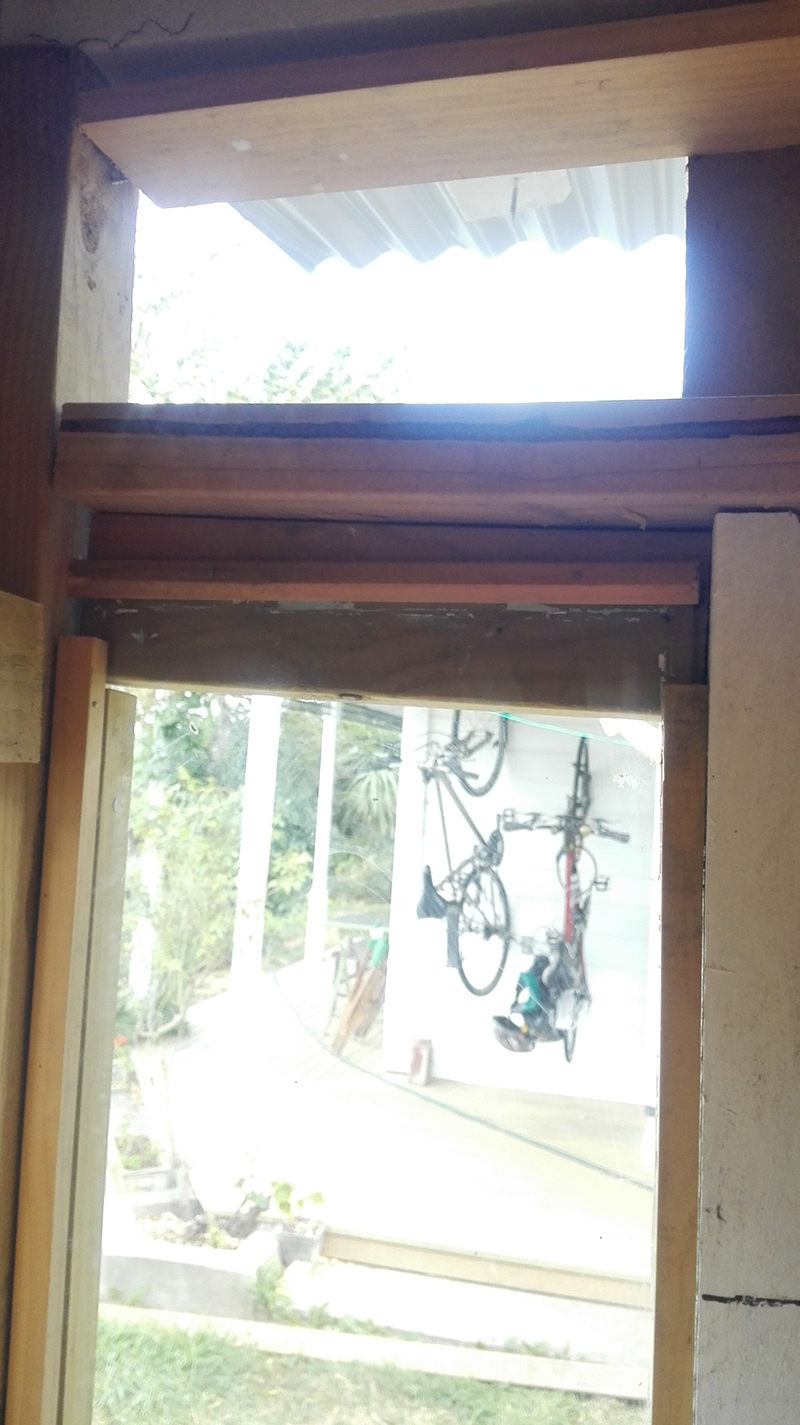
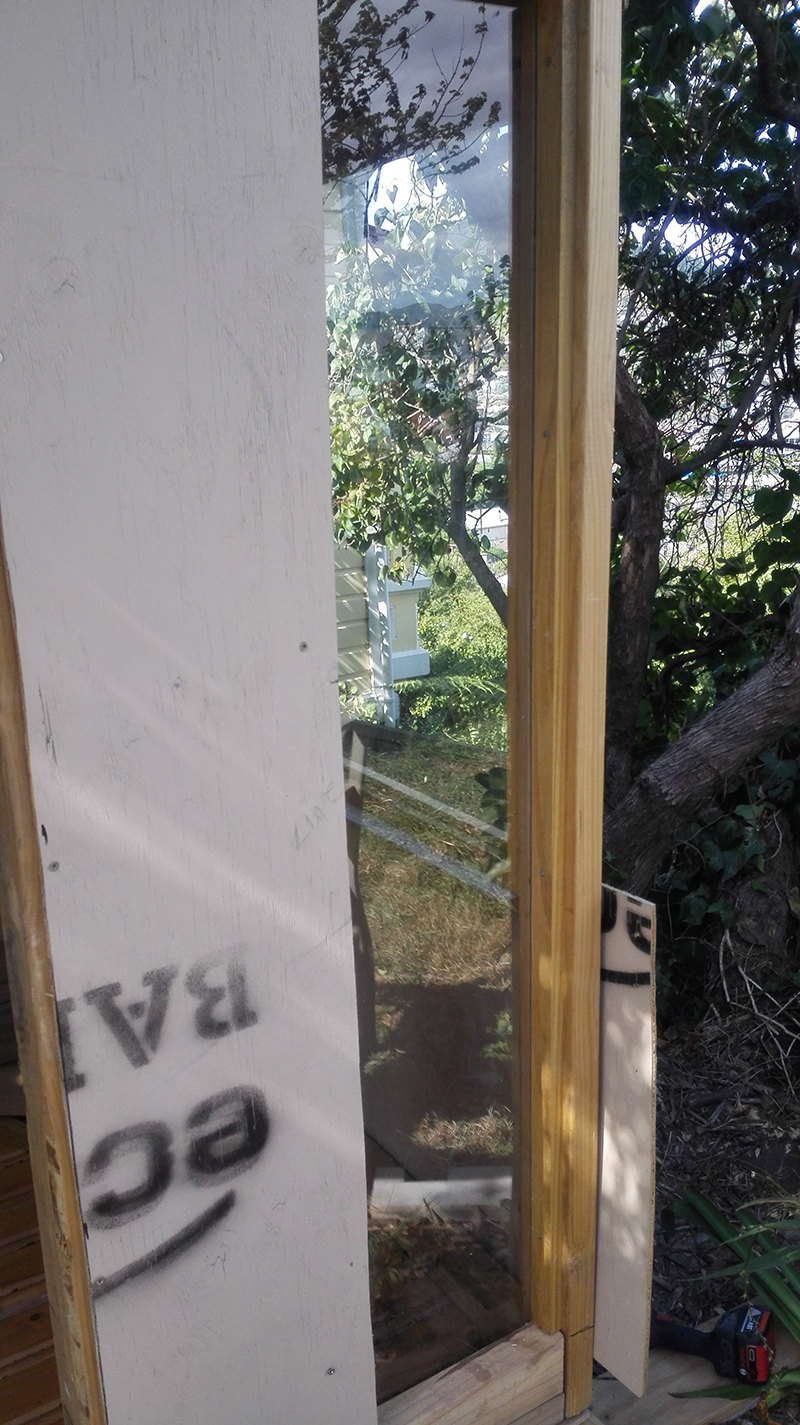
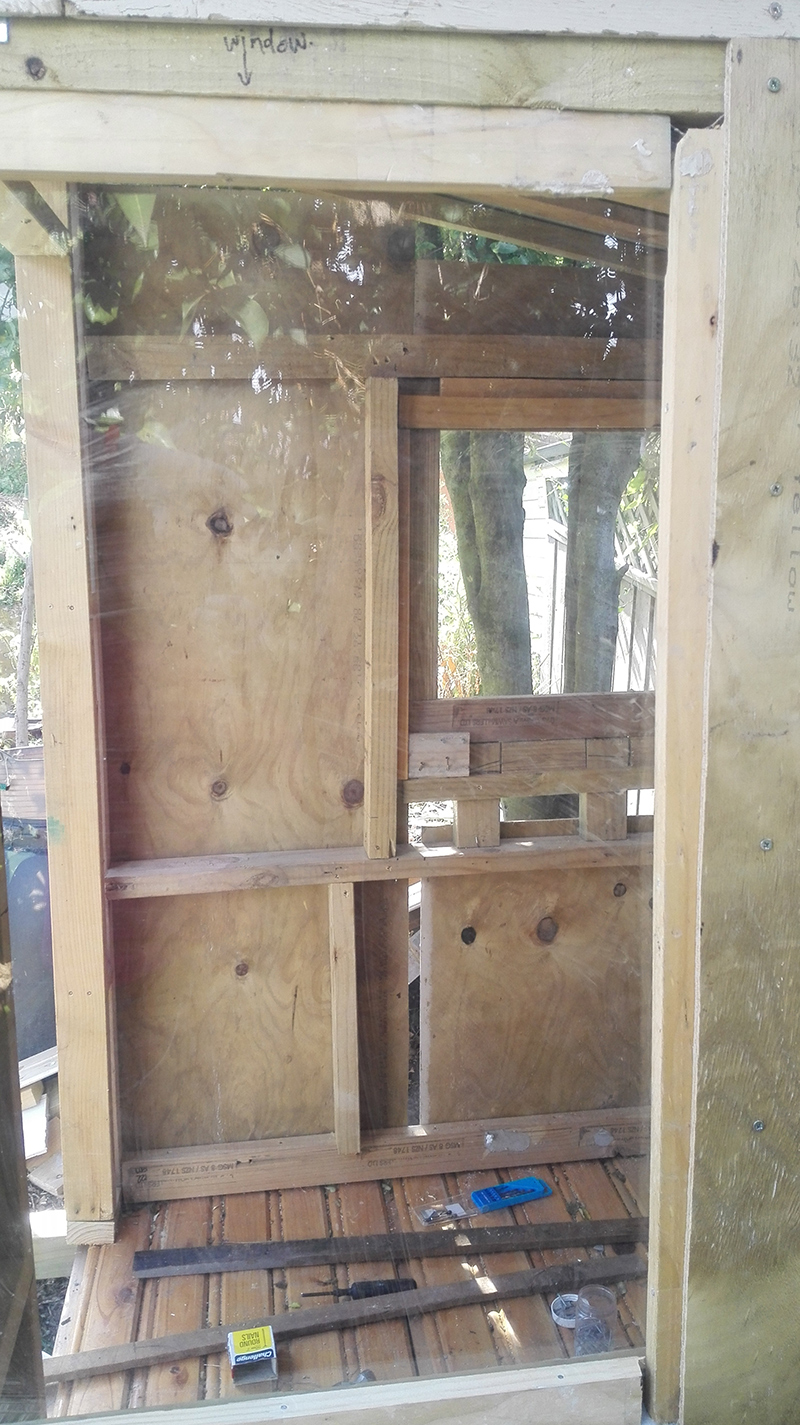
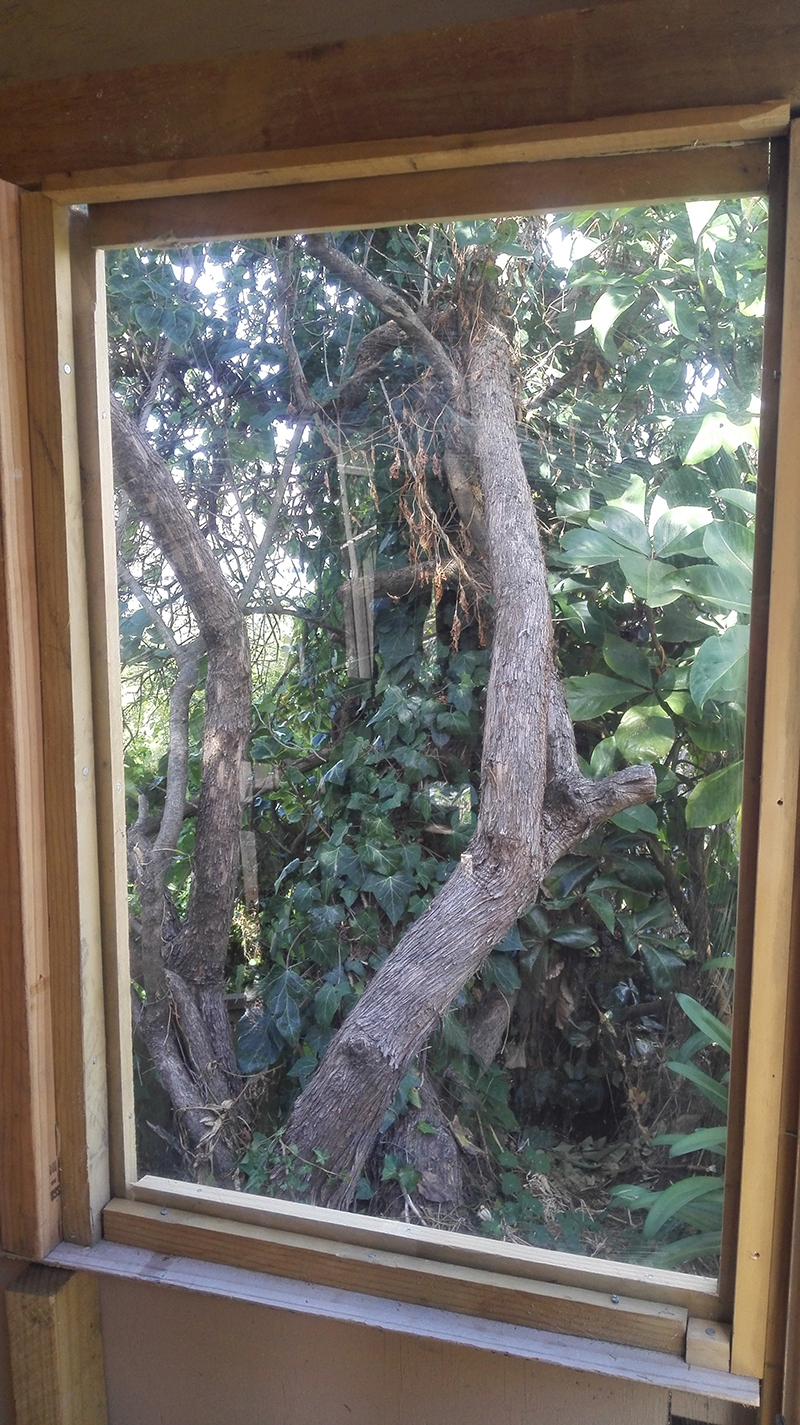
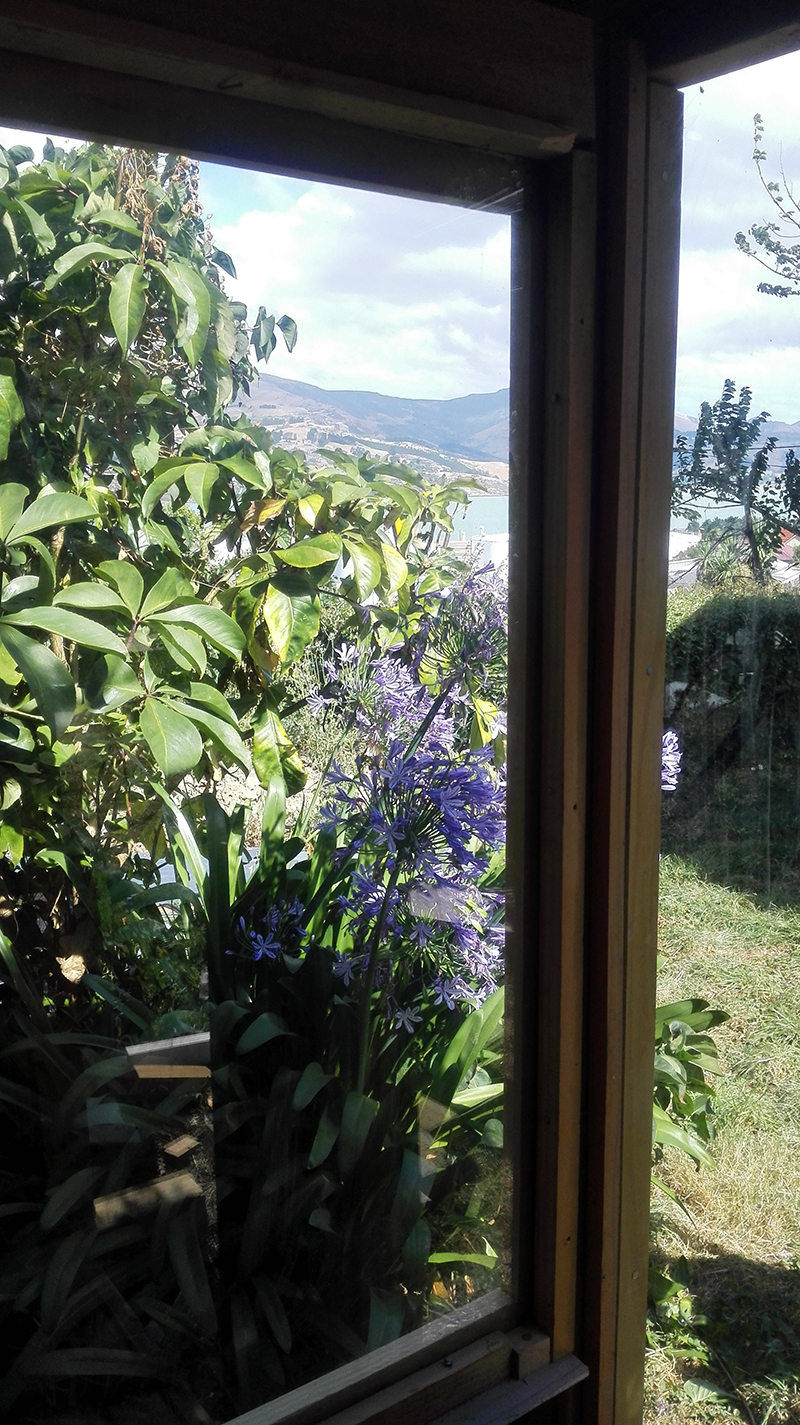
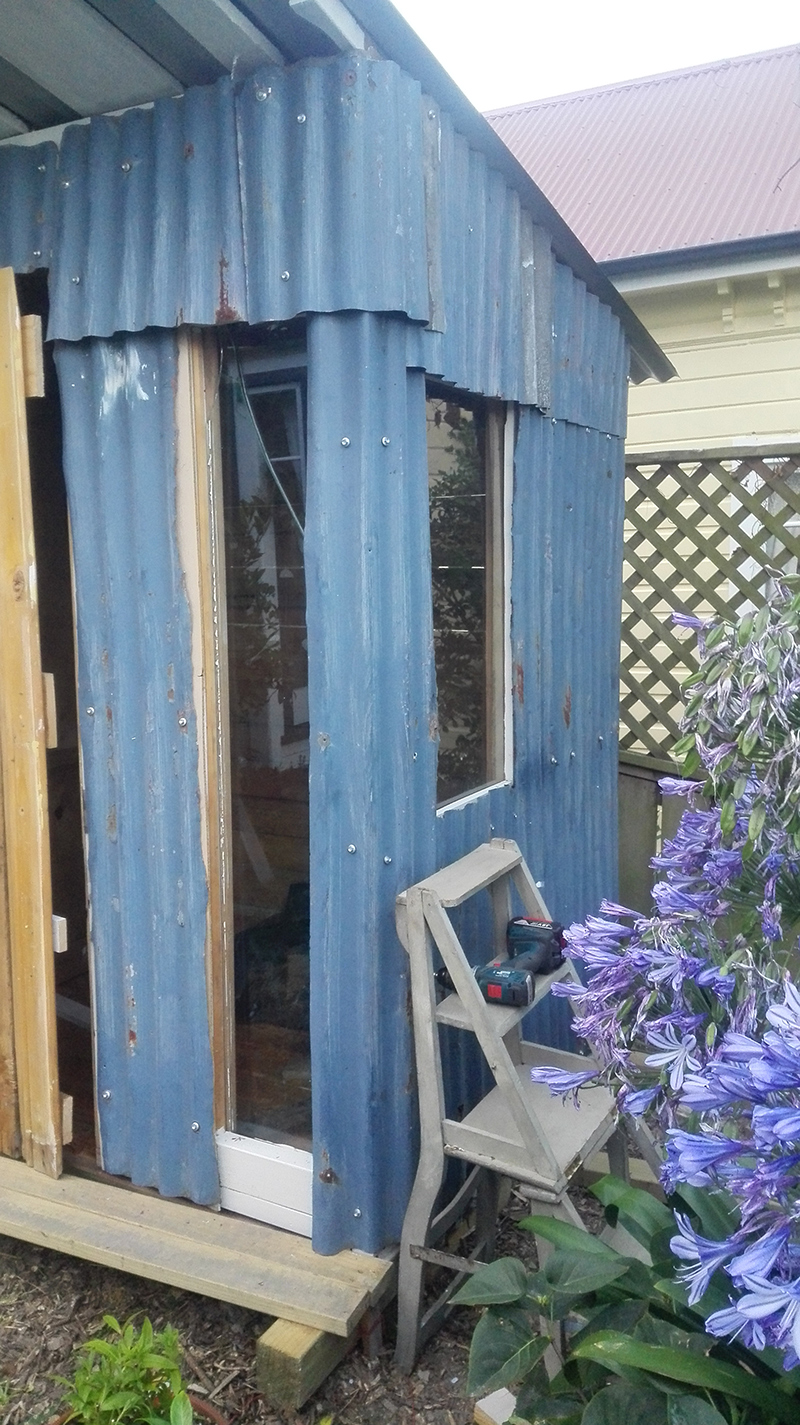
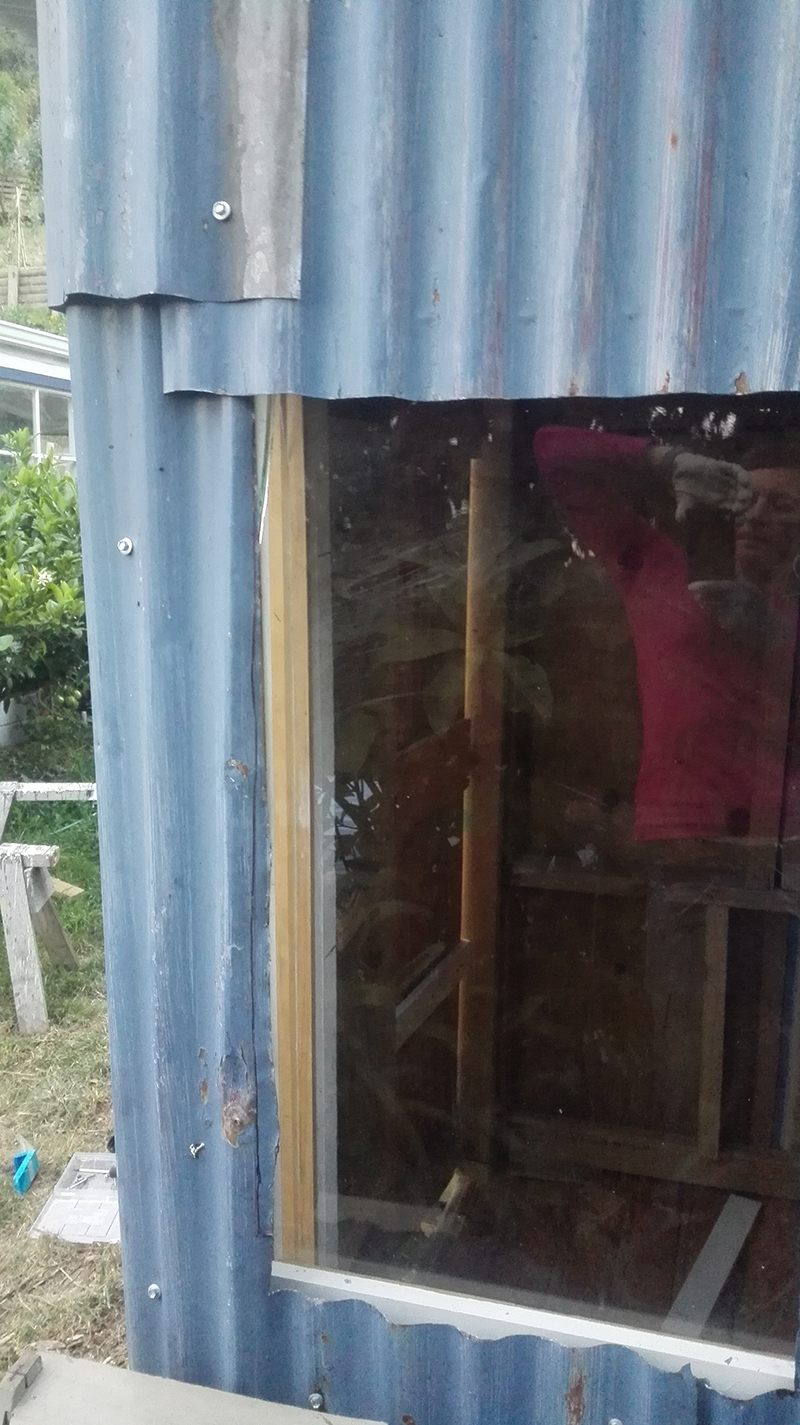
Putting in windows
We have great views and I had glass I could use, so I put in some windows (using wood slats, not putty, to secure them). This is hard. I learned that you don’t screw/hammer anything in after the window has gone in as you’ll crack it! One window has been boarded further and I’ll need to replace another. But I have windows!

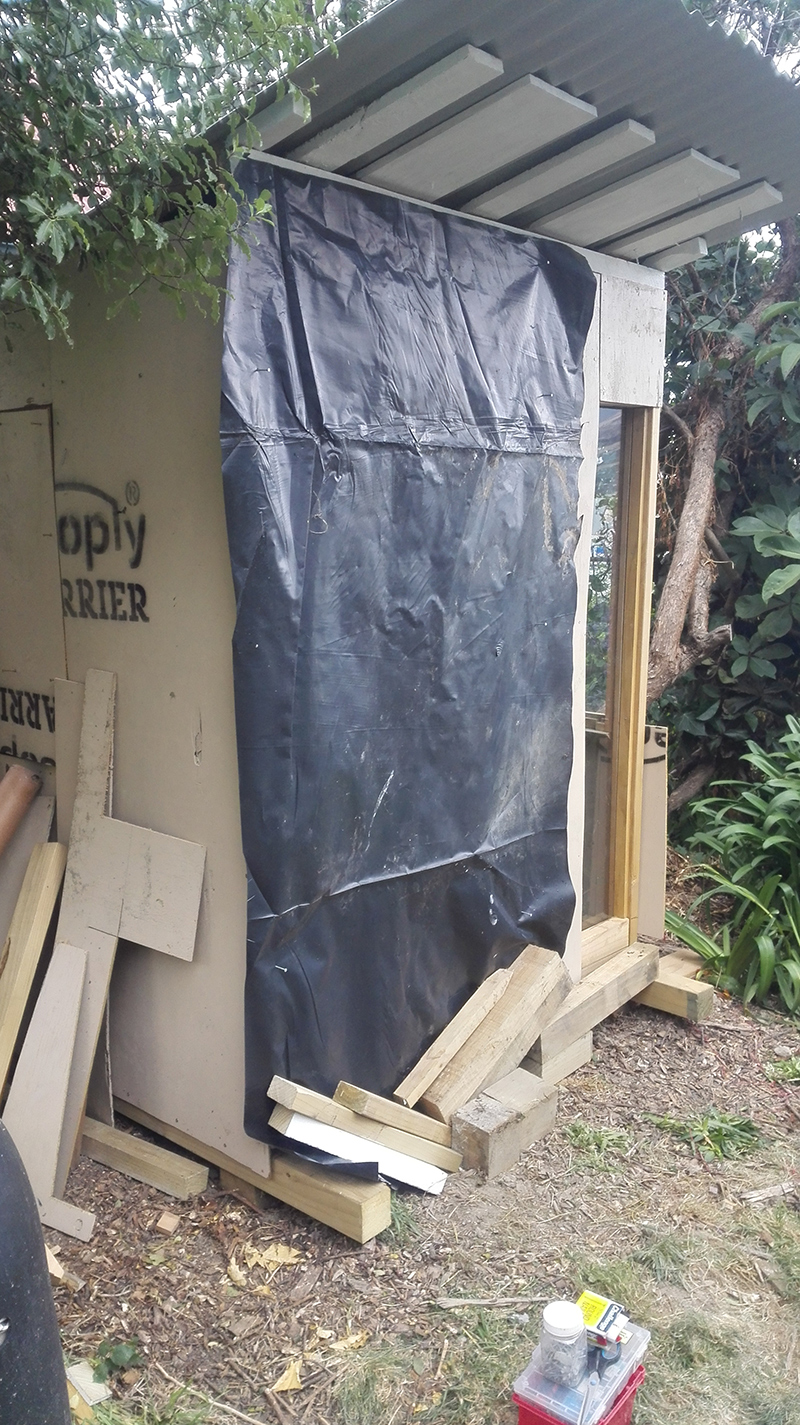
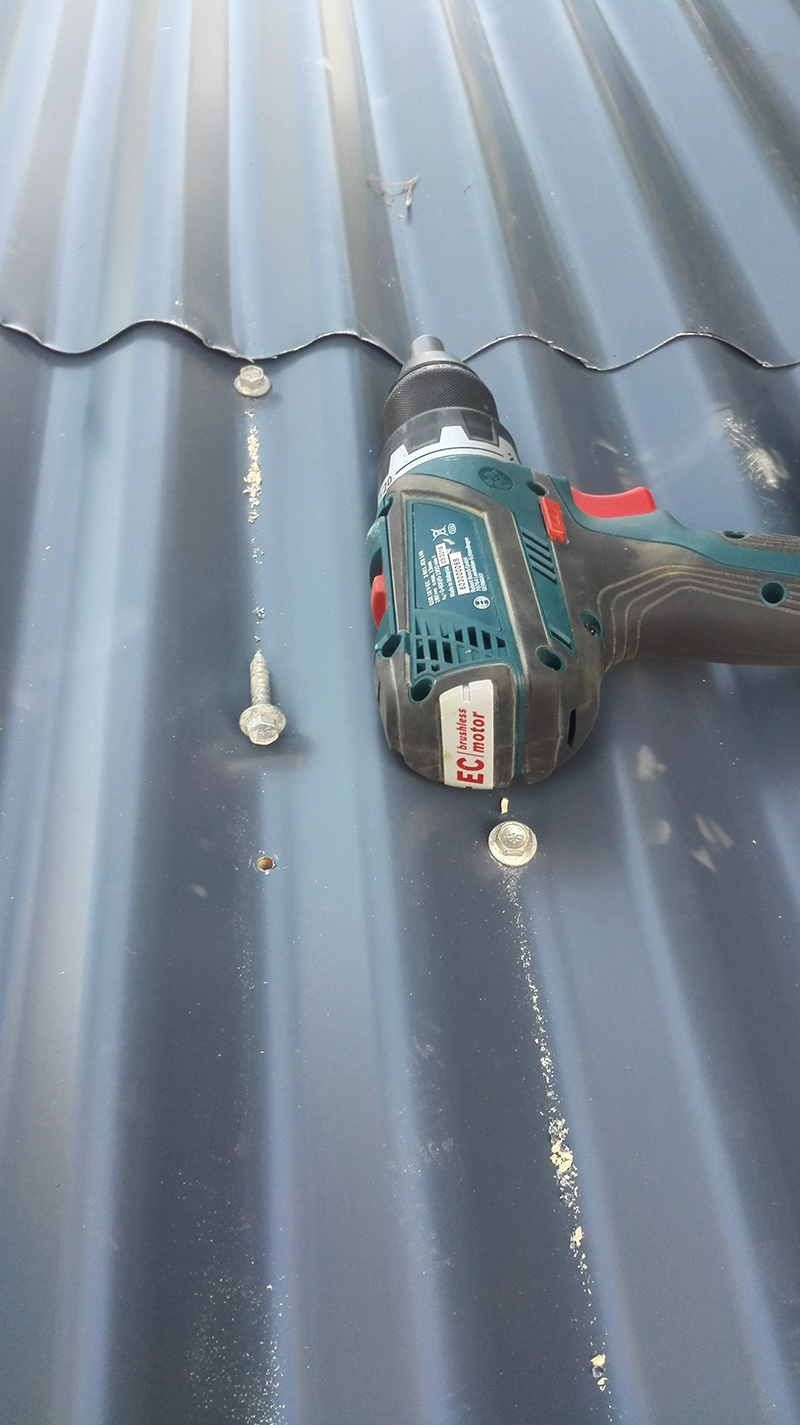
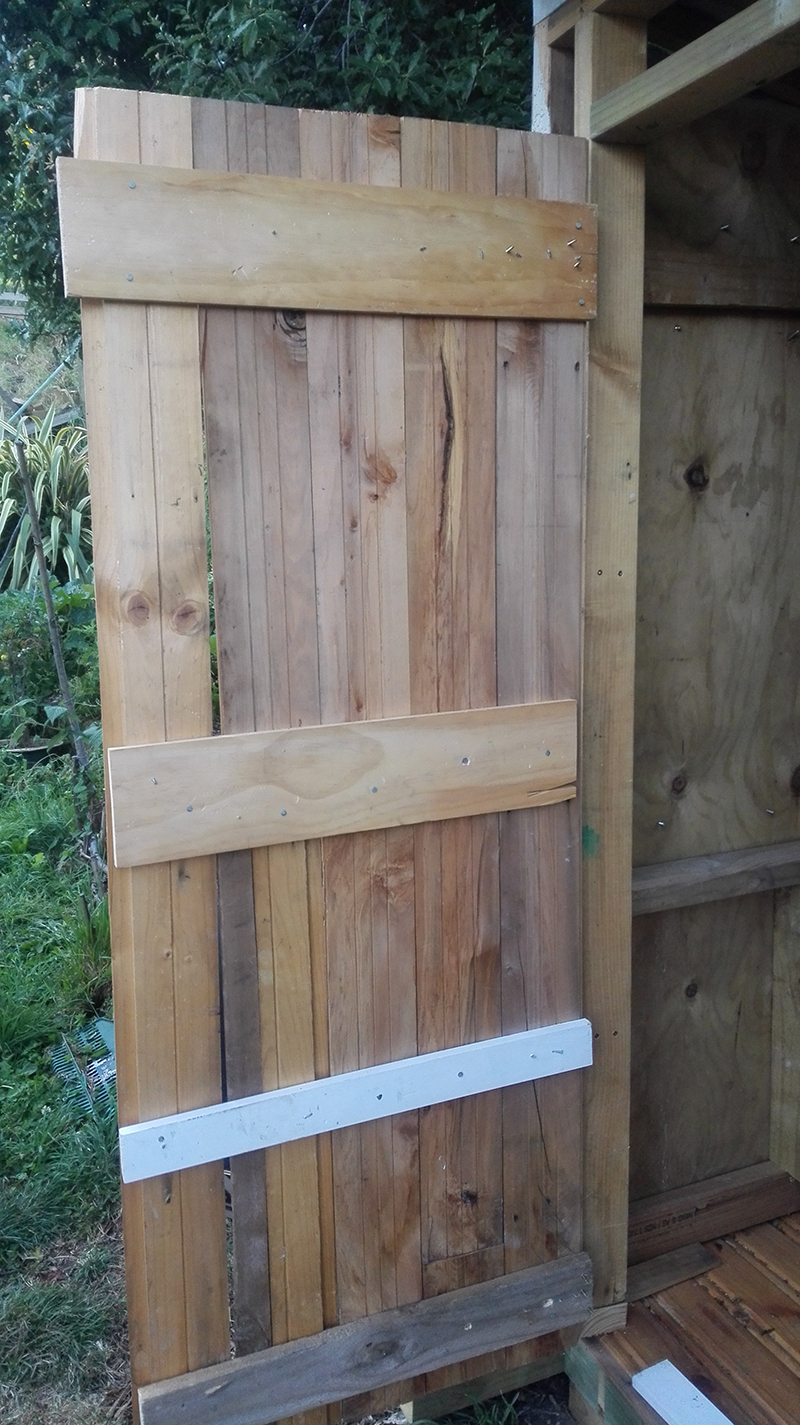
I made a door from screwing together floorboards and started attaching tin
Attaching tin is so much easier with hex bolts. I pre-drilled holes in the tin and then used the drill to screw in the bolts.
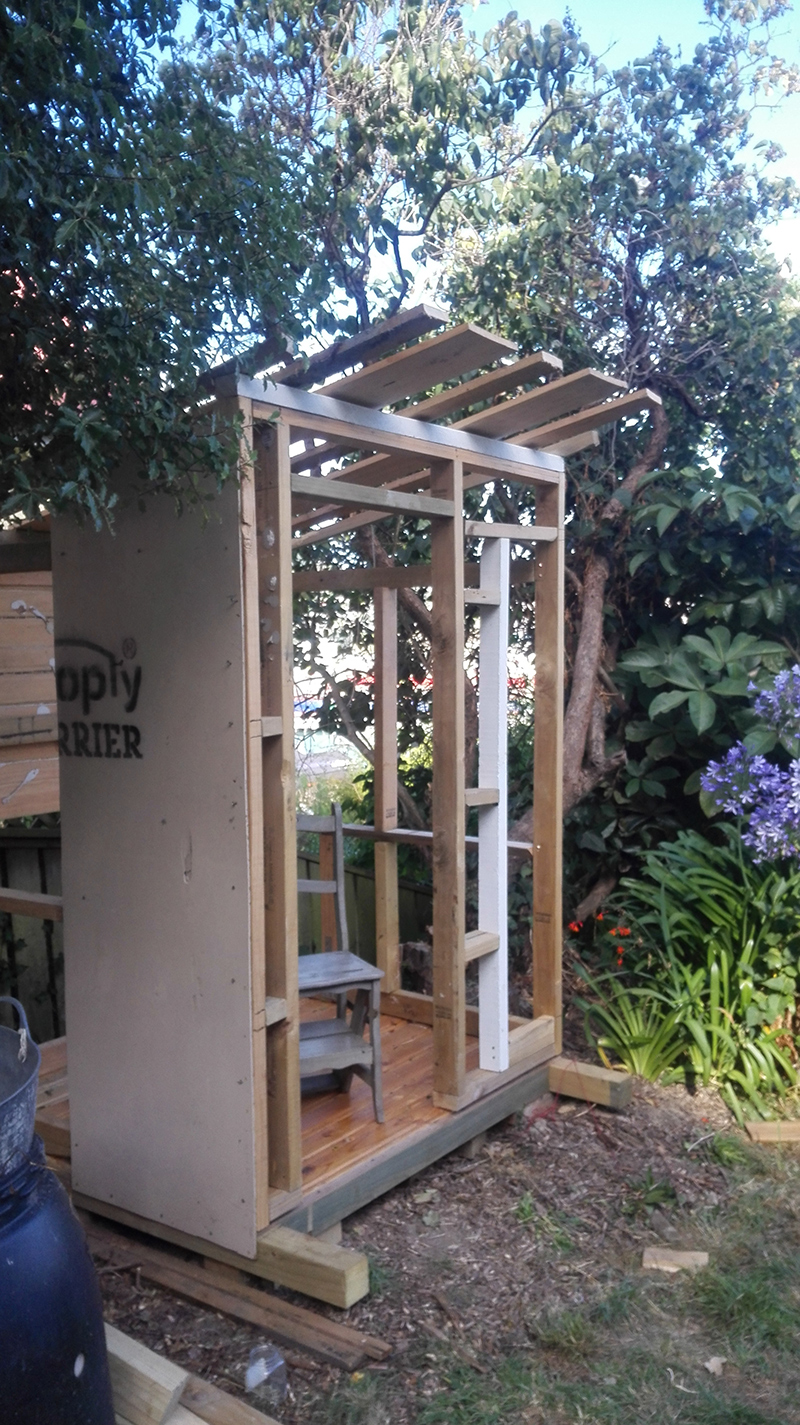
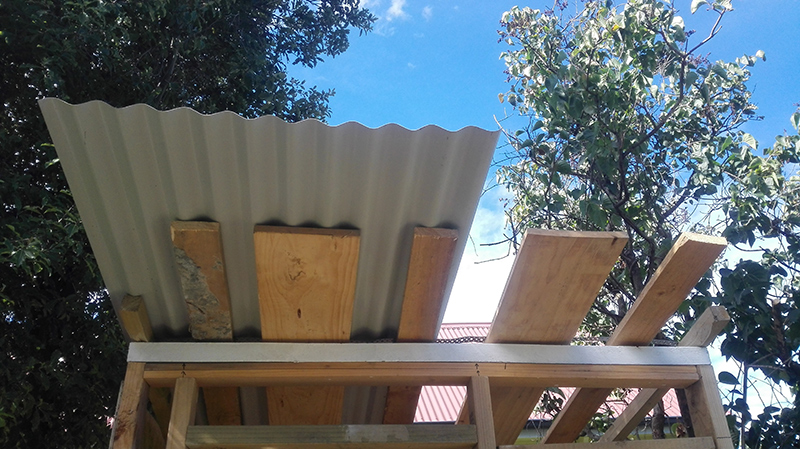
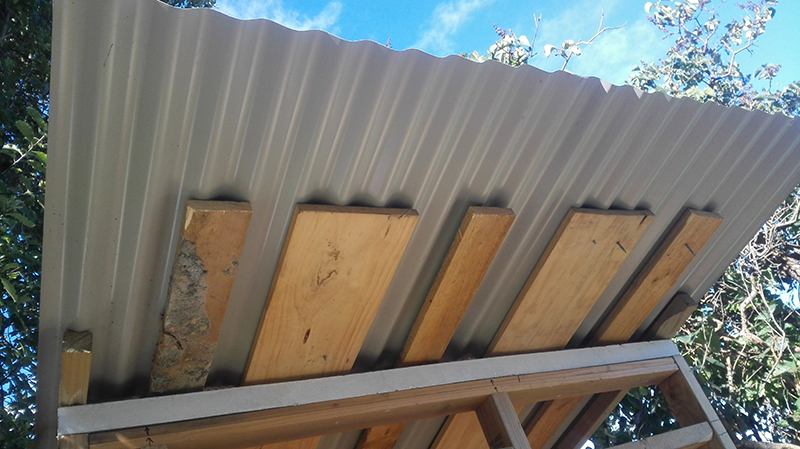
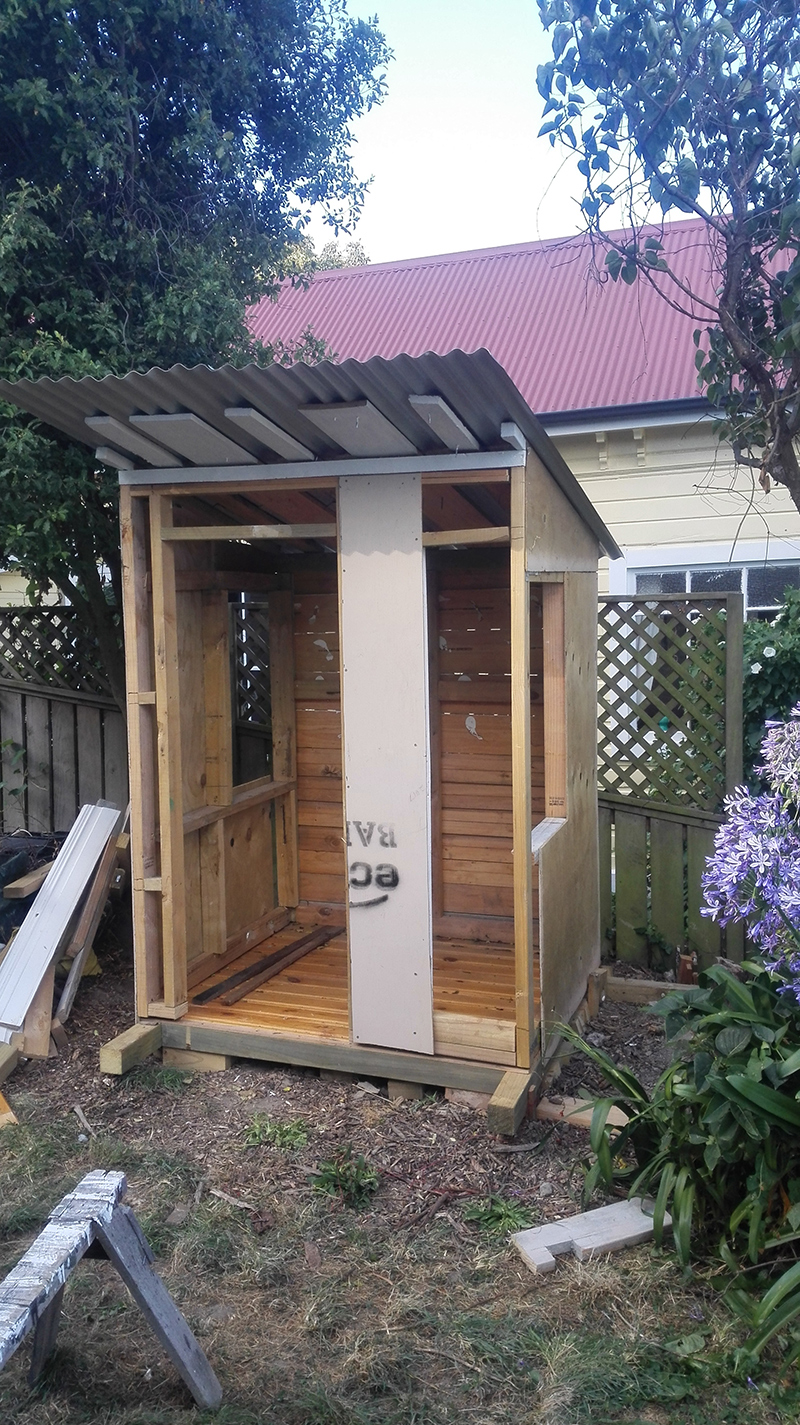
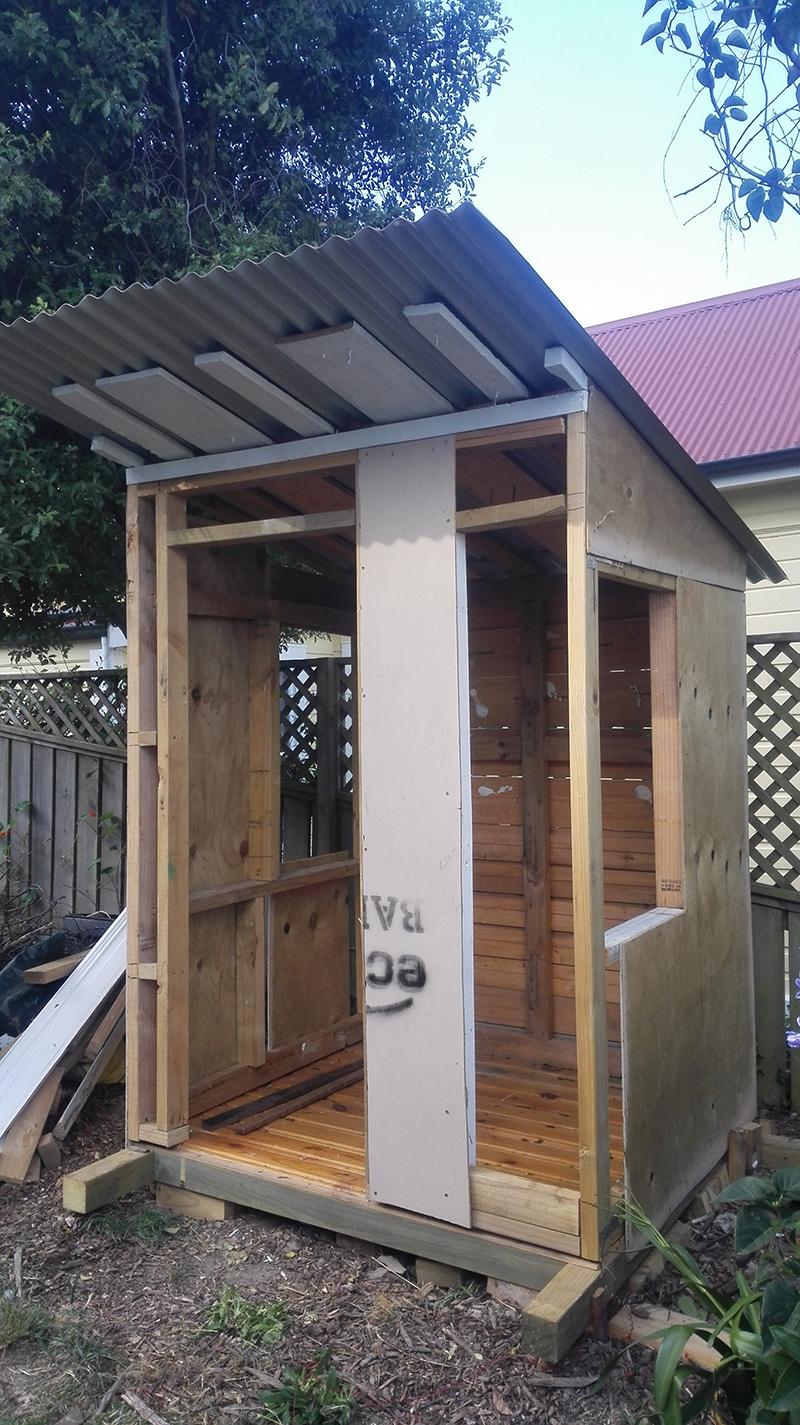
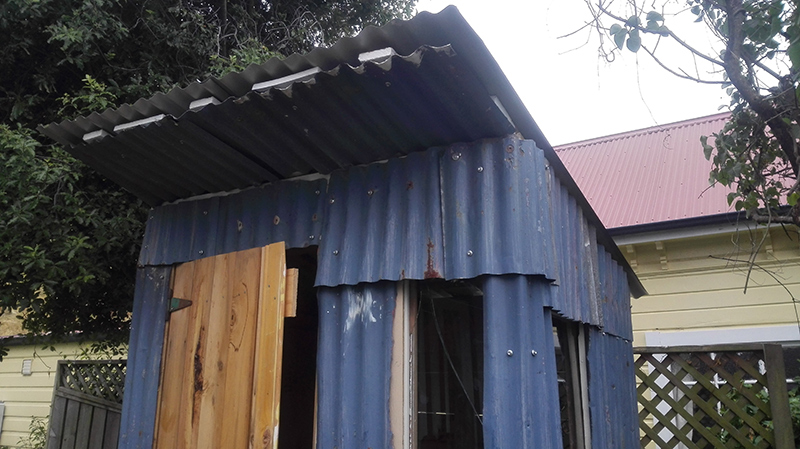
Making the roof look better
I wanted to shorten the overhang and attach tin to the underside. That meant I had to get the roof nails out. The only job worse than this was cutting the tin. I then reattached the shortened roof with screws.


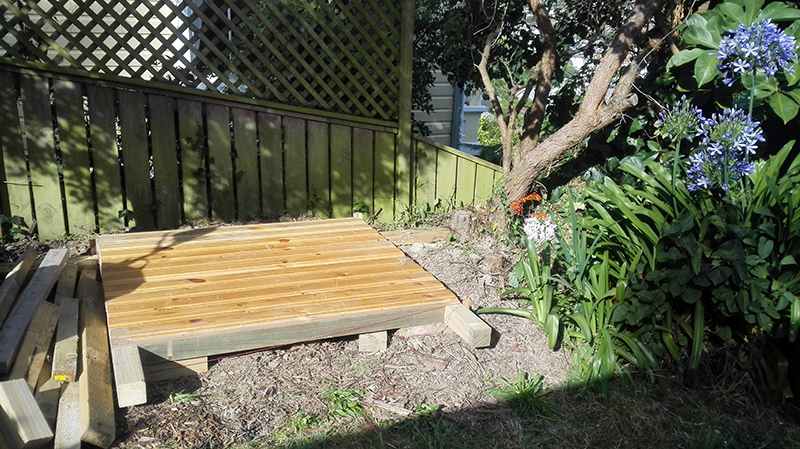
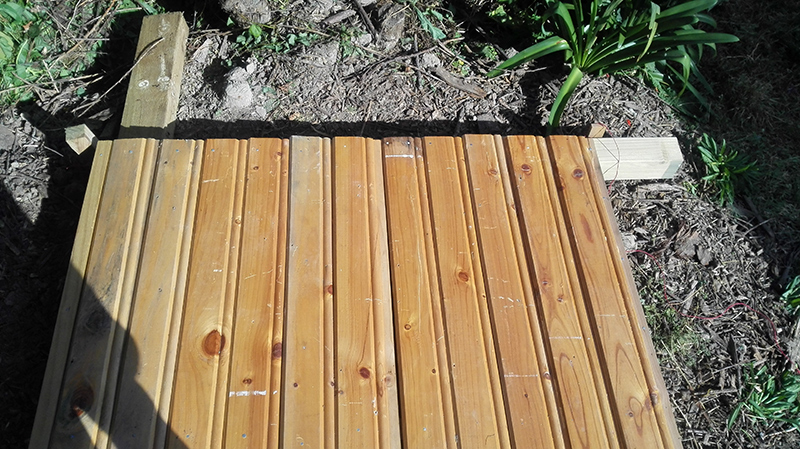
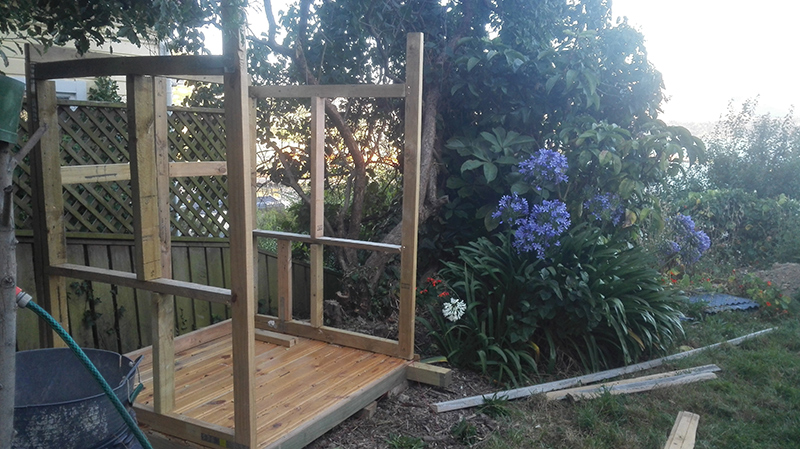
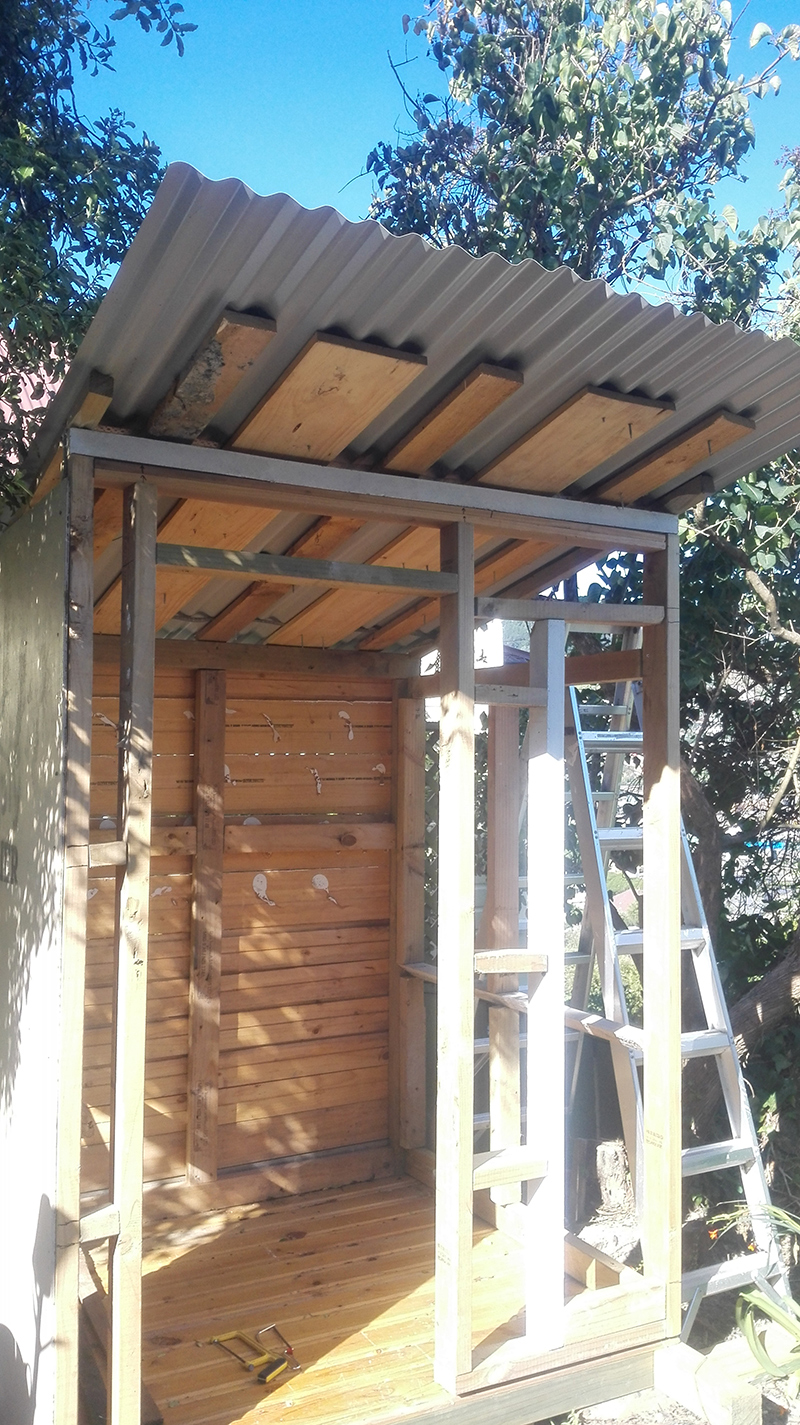
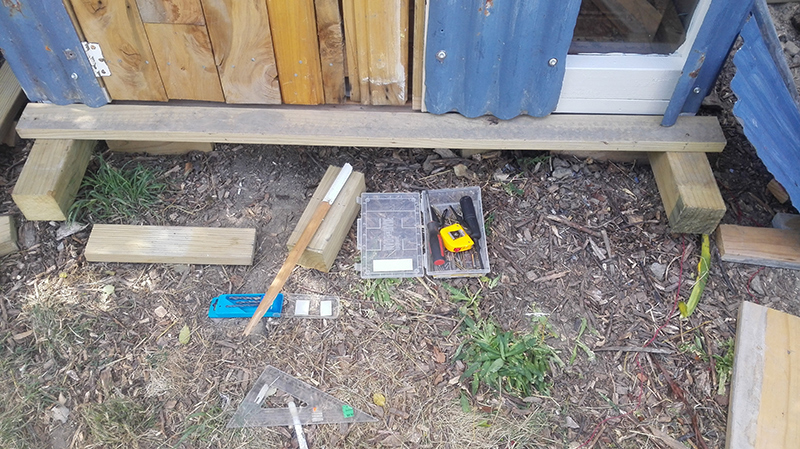
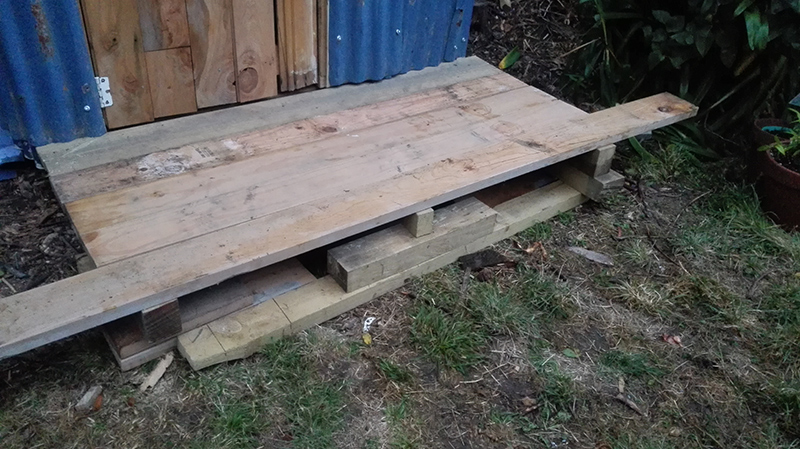
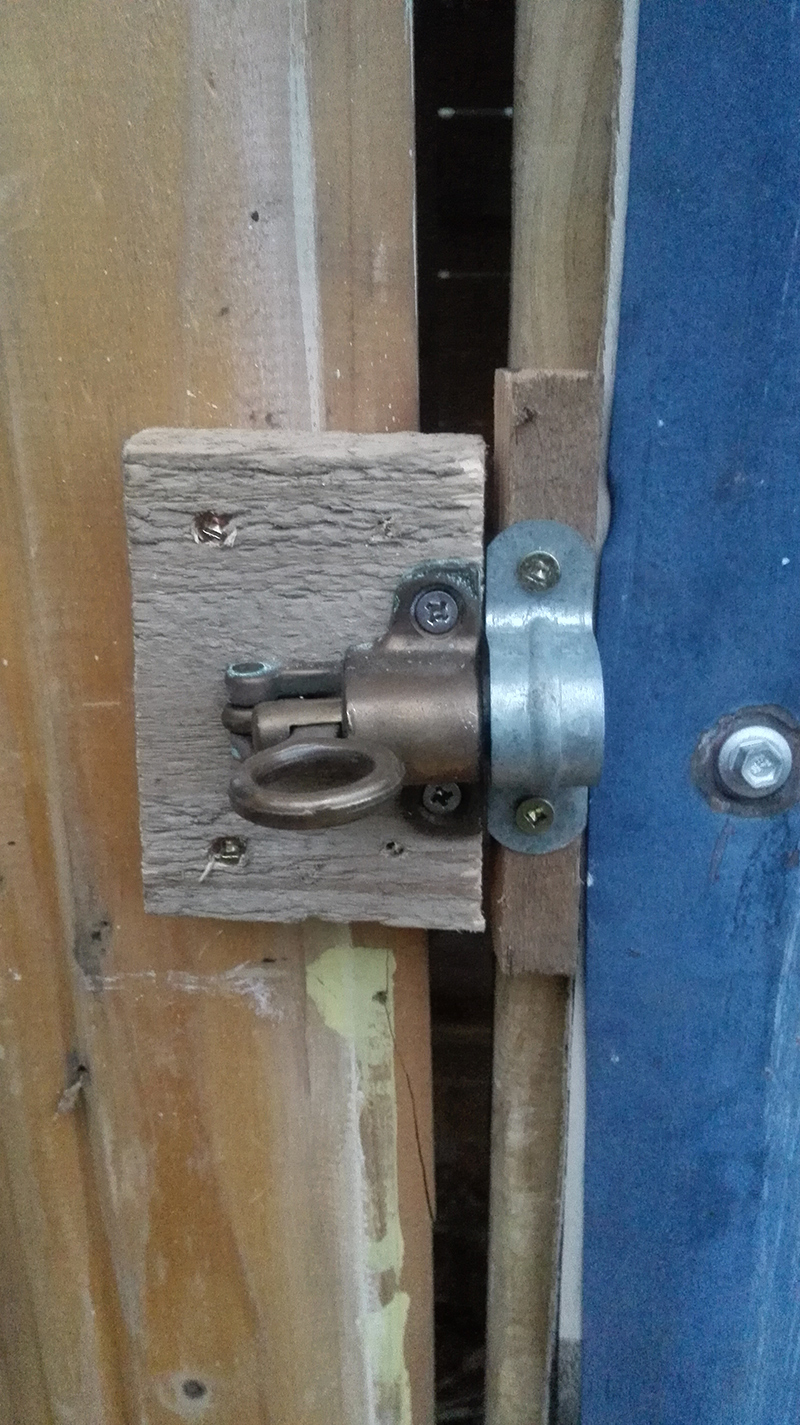
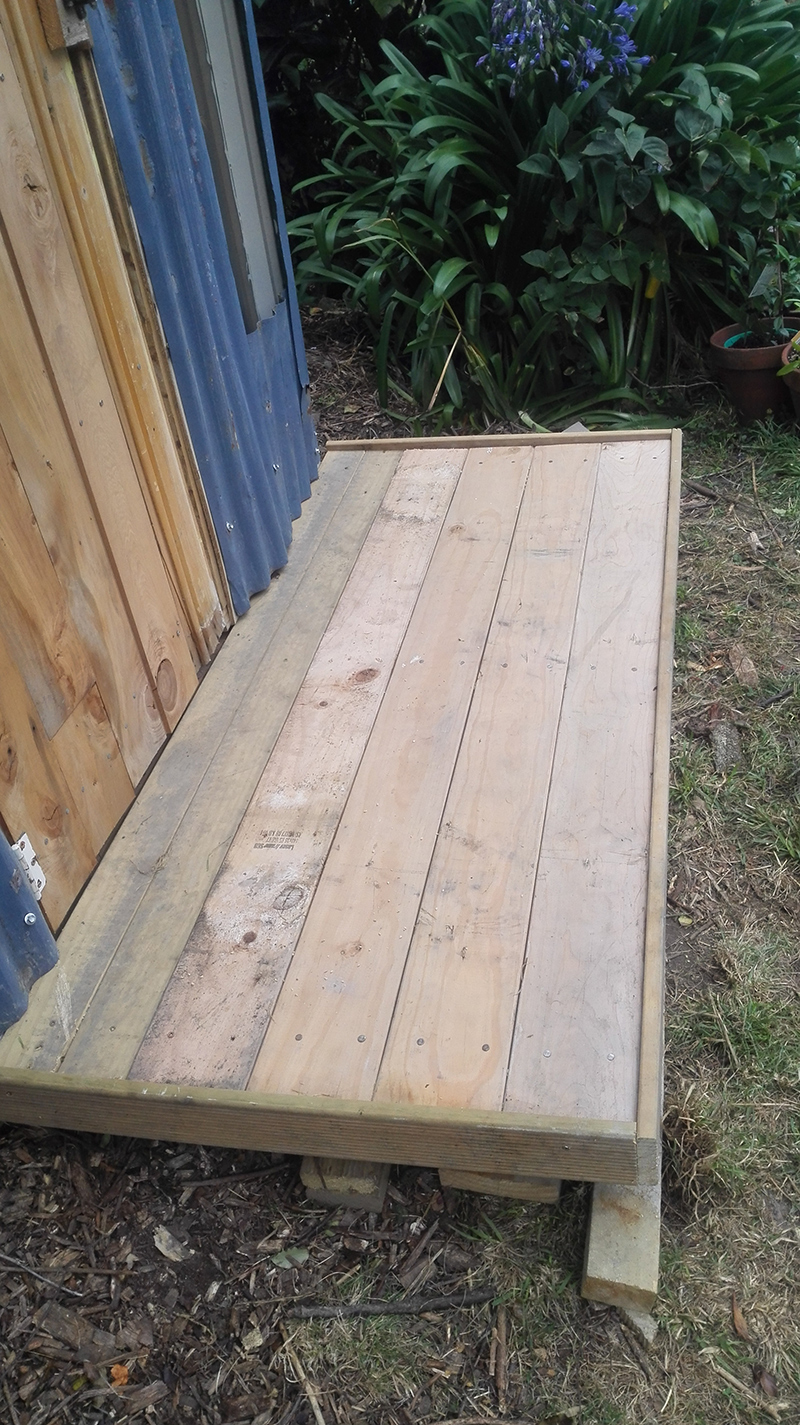
Attaching a deck and a door fastener
The deck is currently balanced on wood offcuts, as I’ll seat it properly on wood piles once the shed has been re-levelled. I bought the door latch from a garage sale in Lyttelton and found a thingy for it to go into at the eco-shop.

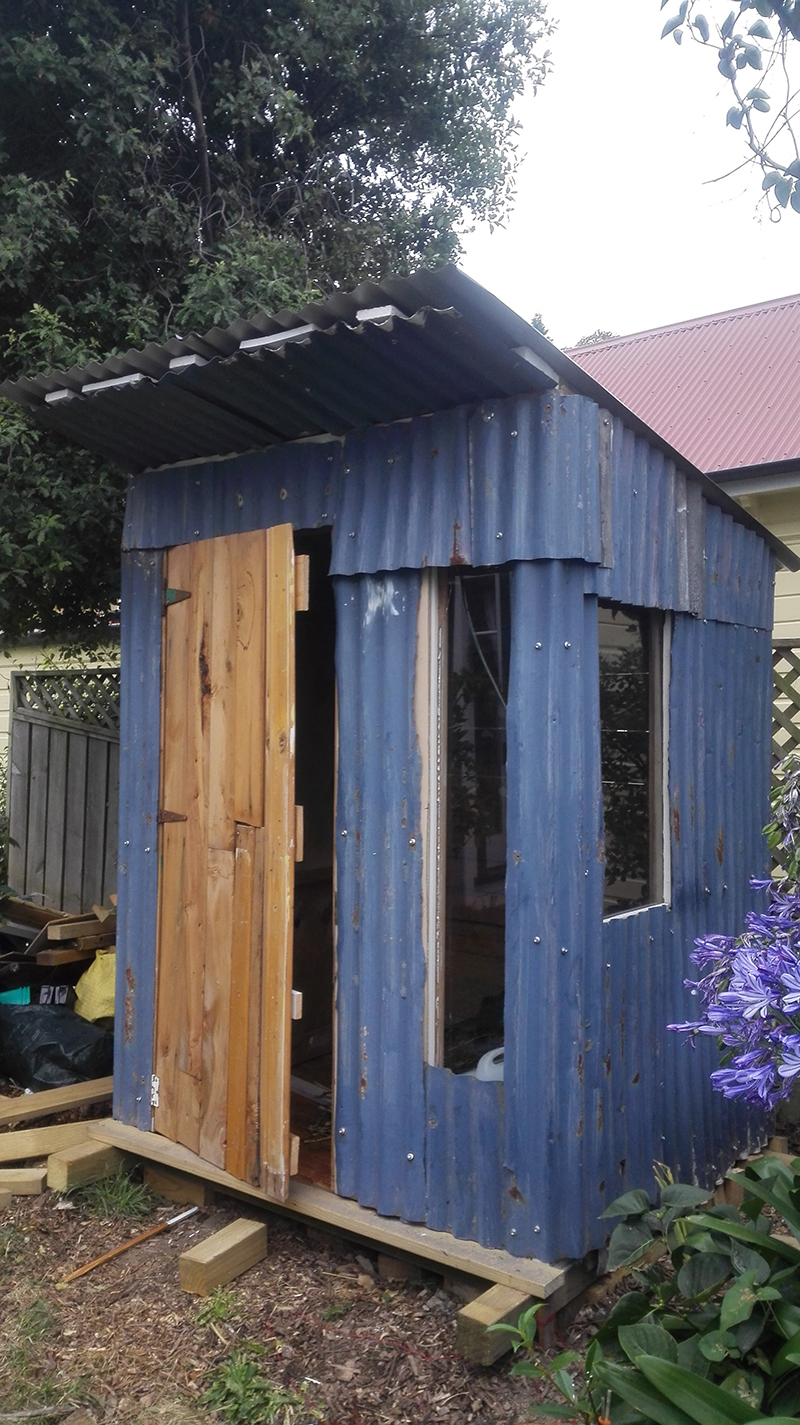
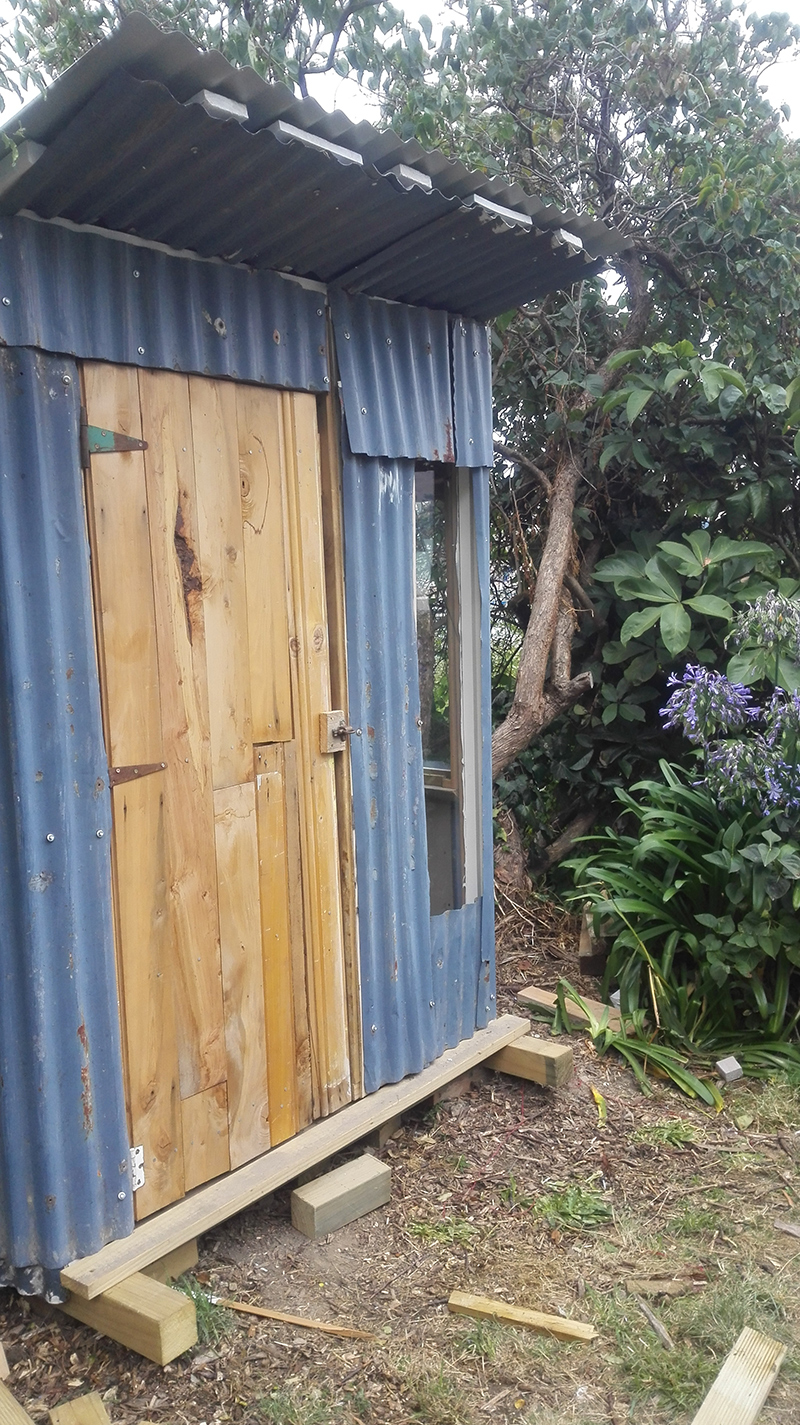
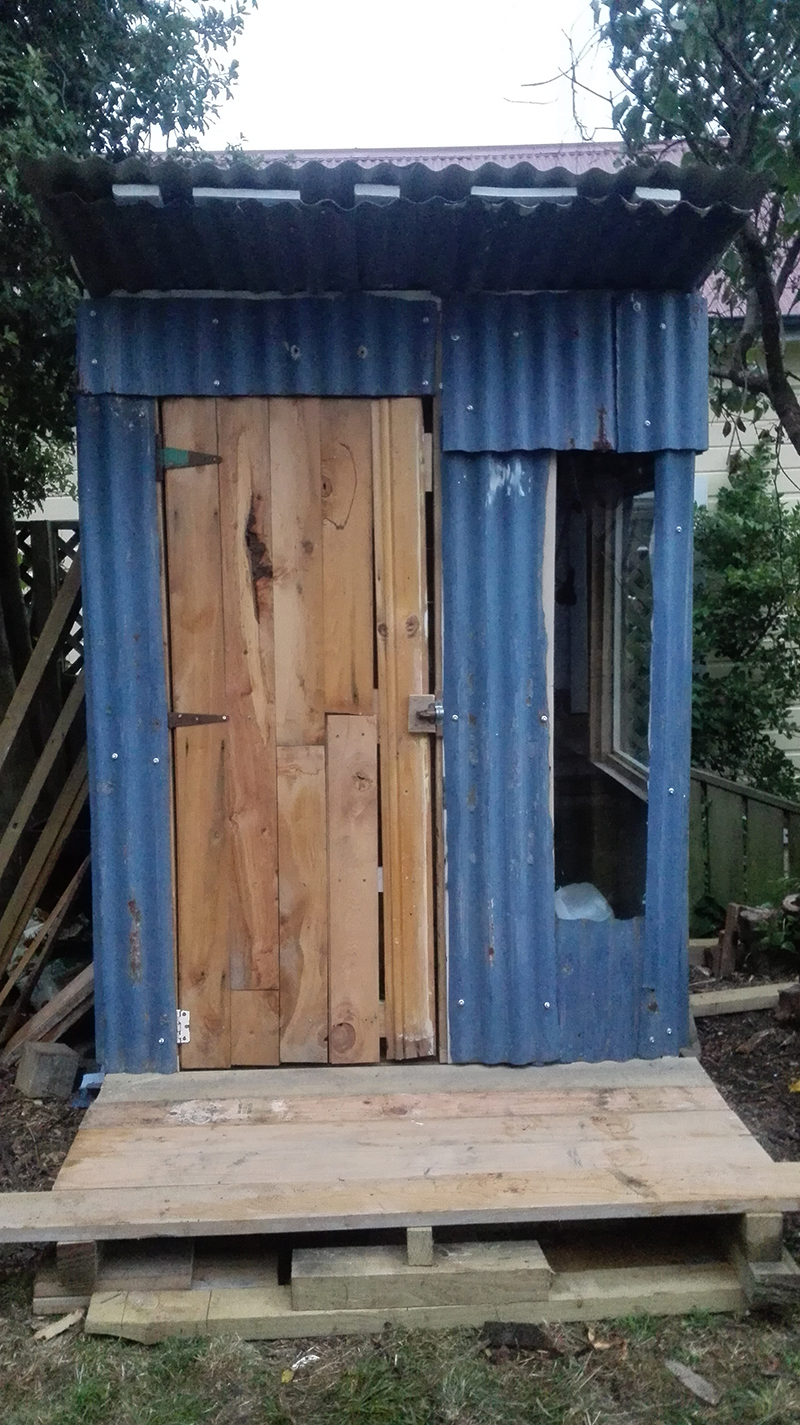
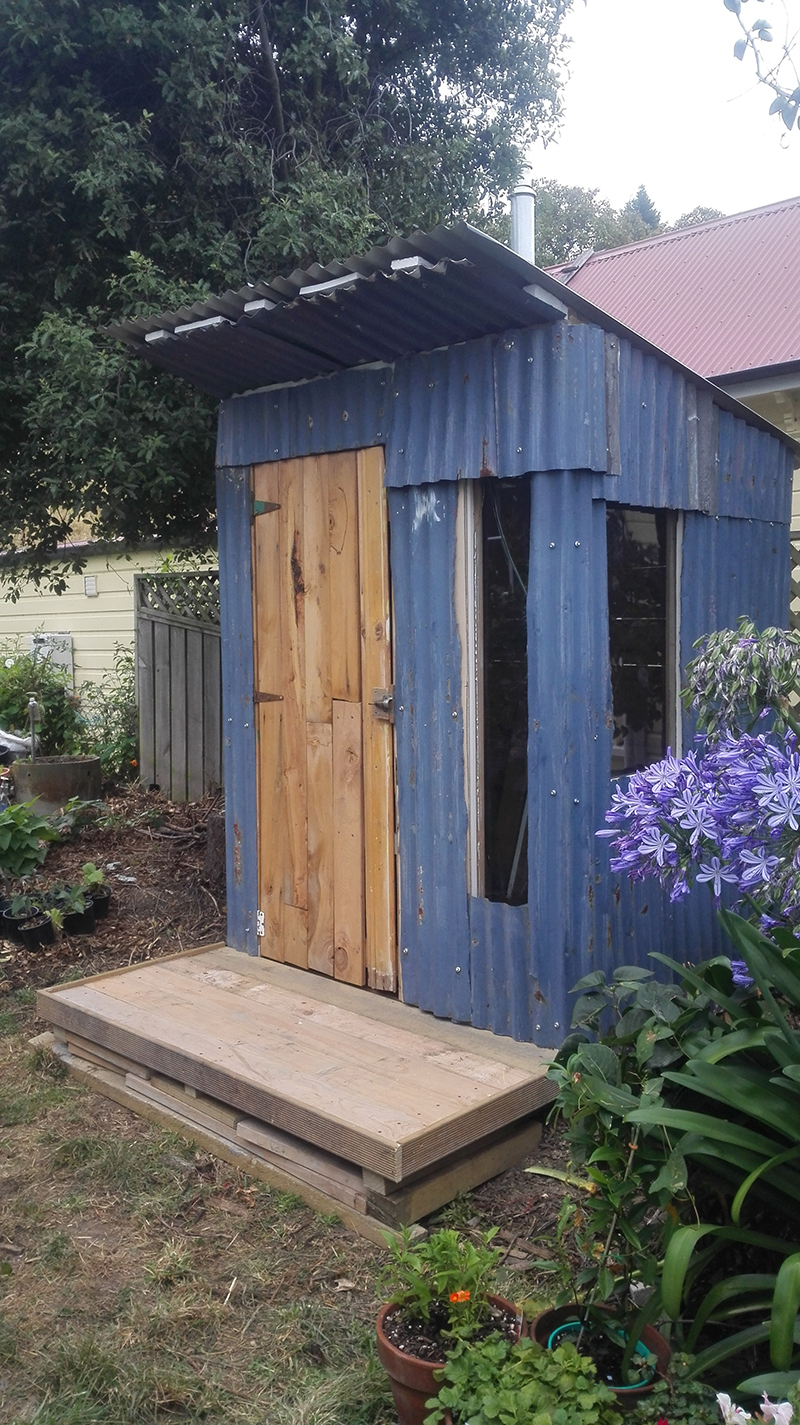

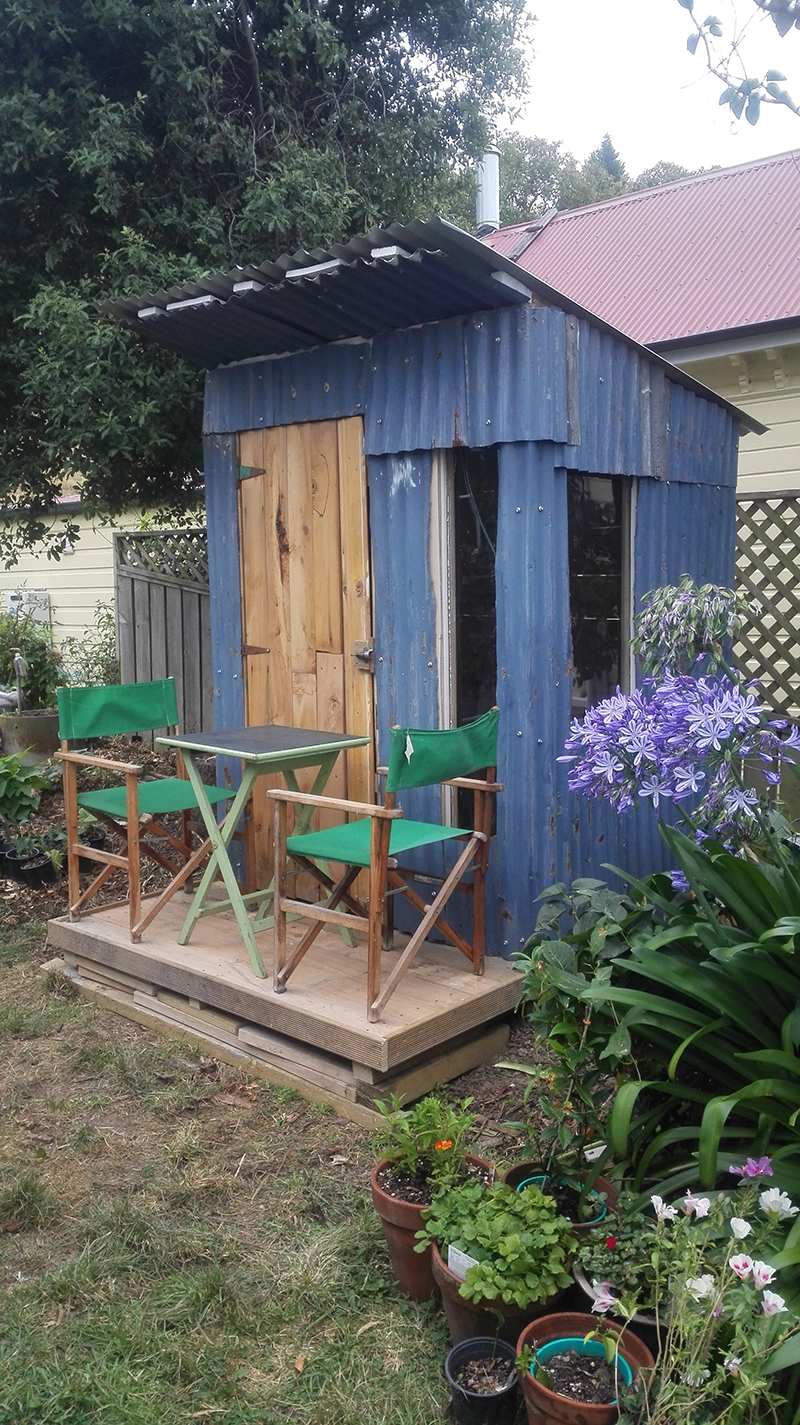

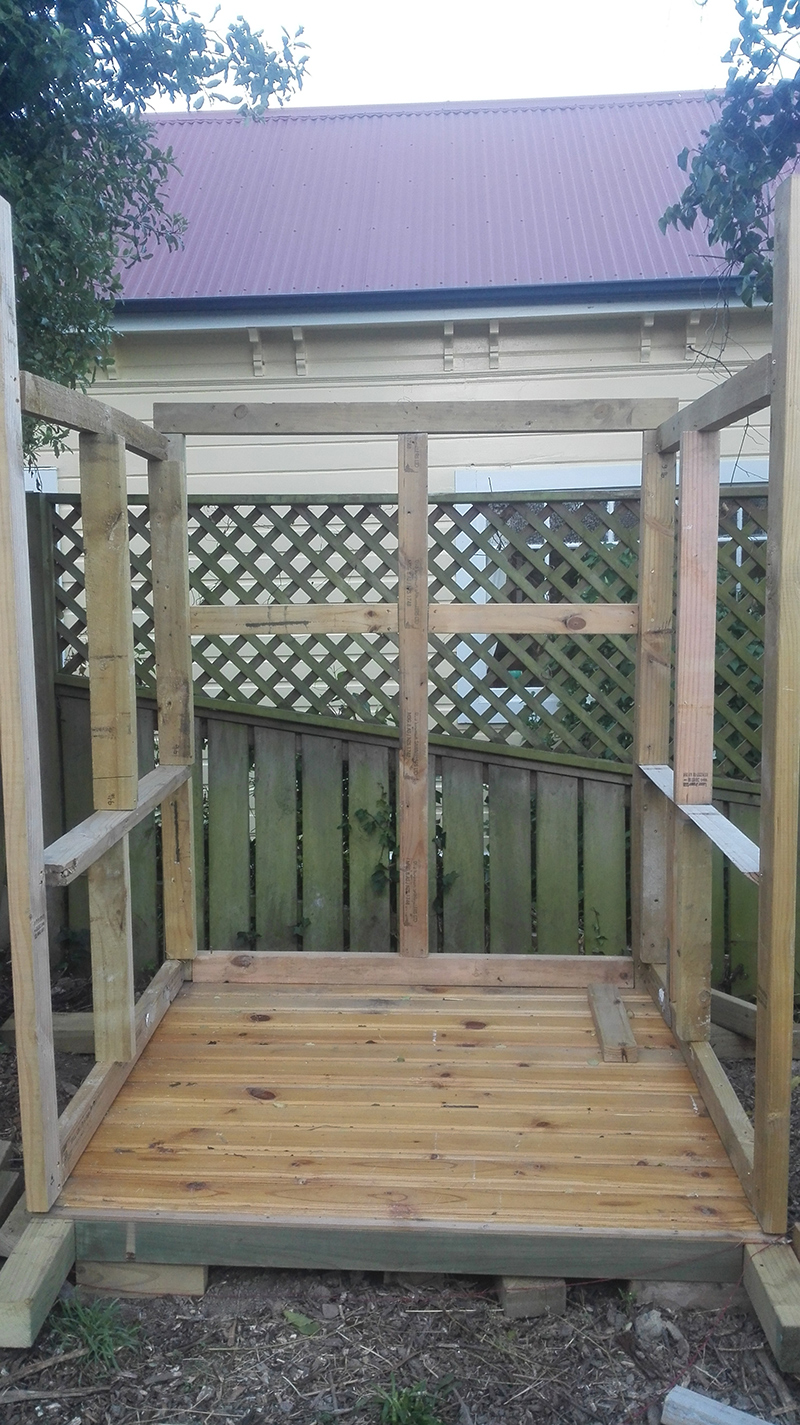
Here is the how it looks now (I just have to level it and finish the inside):
Living in New Zealand: Tuataras are Cute

Click to see options for using the image
Tuataras have been kicking around for a long time. They were a top predator in New Zealand before people arrived with their associated rats and other pests. I’ve only seen a tuatara in a zoo (in Invercargill. I think his name was Henry). But I have drunk a tuatara beer and it was lovely.

I love the design of the glass bottle that tuatara beer is in.
Living in New Zealand: Taking a Trip to Otamahua Hut on Quail Island

Click to see options for using the image

My inflatable paddleboard and all I needed for my overnight stay (including sleeping bag, food and cooking gear)

The view of Quail Island from Naval Point, Lyttelton - a good boat ramp to leave from
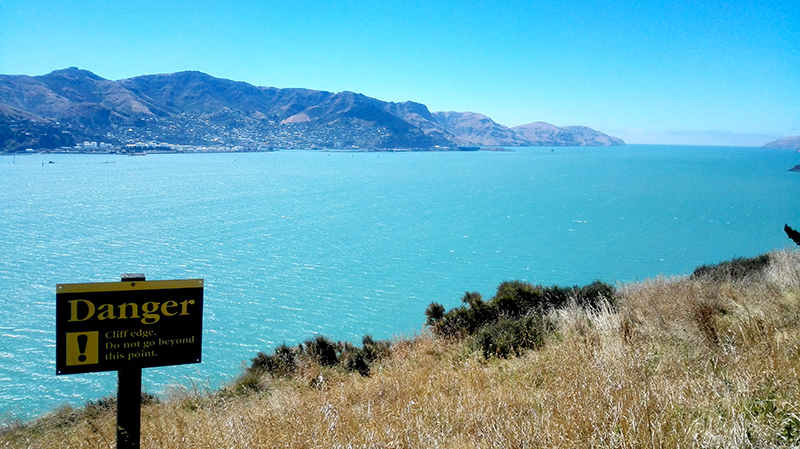
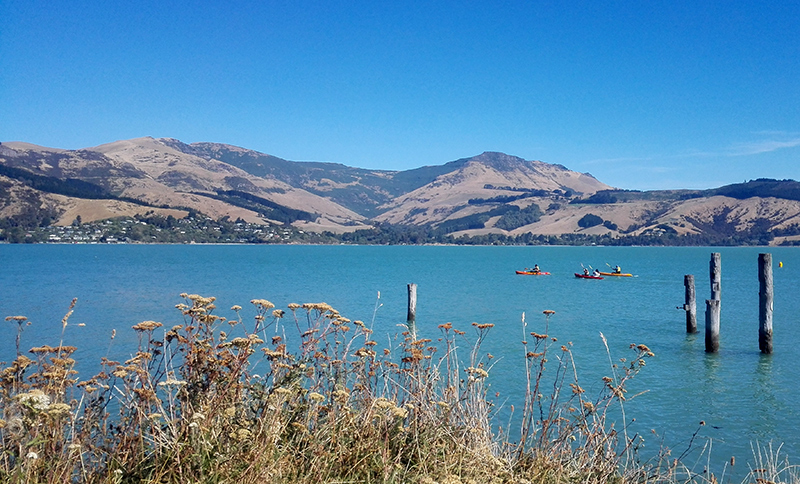
Quail I Island is in the middle of Lyttelton harbour. Māori called Quail Island “Ōtamahua”, the ‘place to gather sea-bird eggs’. None of that happens now, but I saw plenty of seabirds on the surrounding rocky reefs as I paddled over: terns, cormorants, oystercatchers and black-backed gulls with their young.

Click to see options for using the image
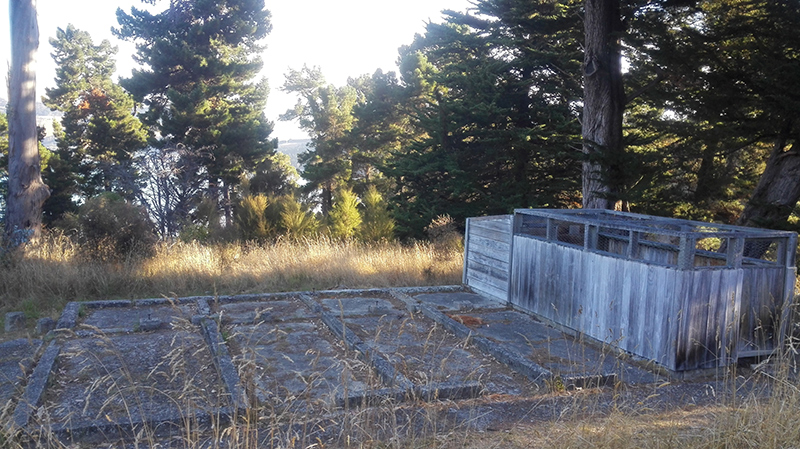
When I got to the wharf, it was low tide, so I rock-hopped to the track. I stashed my board on the way up to the hut, behind the old stables.
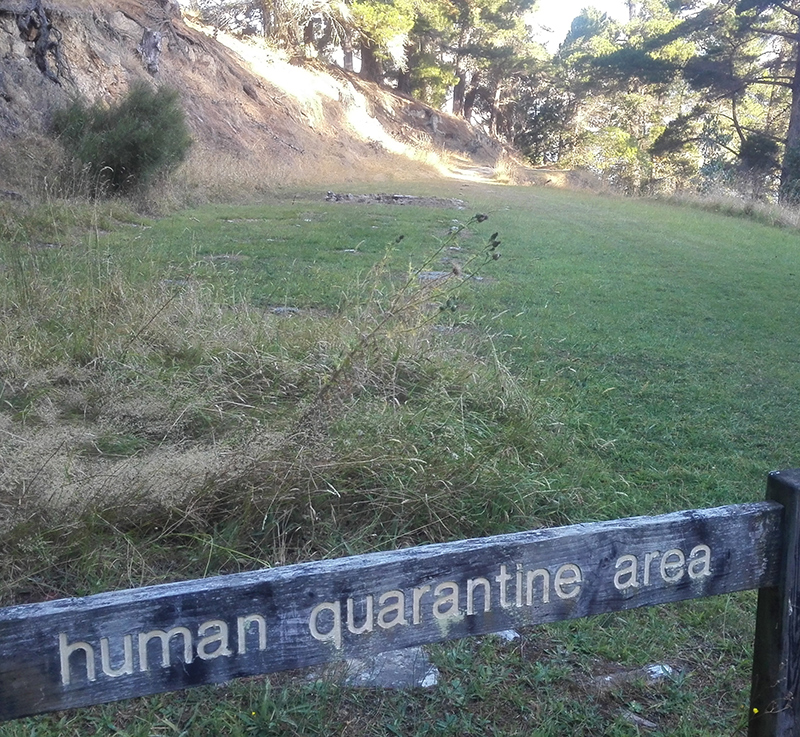
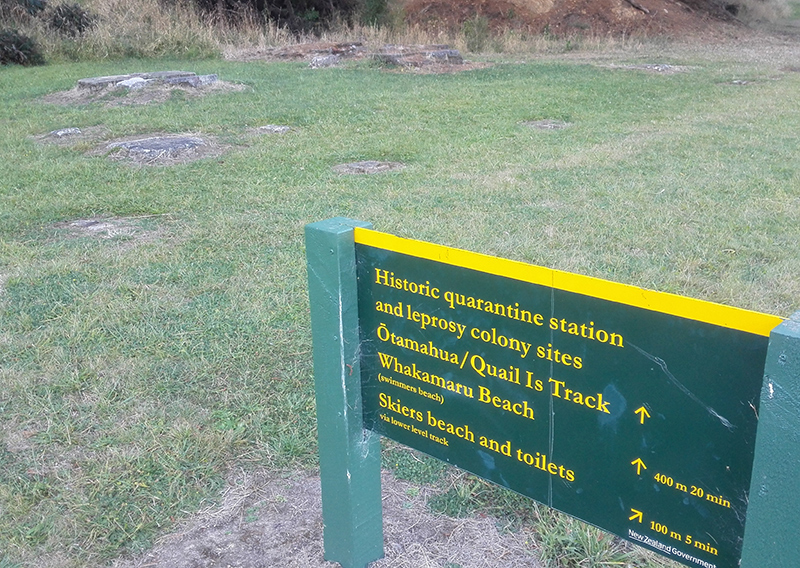
Quail Island was first settled by Europeans in the 19th century as a place to farm, but became a useful place for the new colony to quarantine animals and humans (Including lepers. Read more of the history at https://nzhistory.govt.nz/media/photo/quail-island ). These days no one is kept there against their will, but you can go over on the ferry and either spend half a day exploring the history, plants and birdlife, and little beaches, or stay overnight at the newly refurbished hut. It costs $30 return to take the ferry from Lyttelton, but it’s an easy paddle in a kayak or on a stand up paddle board, if conditions are right. It took me just over half an hour to get there and about 40 minutes to return. The harbour is usually much calmer first thing in the morning, so it pays to time your paddling for this if this is the way you are going to go.

Click to see options for using the image
The history of Ōtamahua Hut according to the Department of Conservation (DOC):
The hut was built between 1910 and 1920 for the animal quarantine station caretaker by the Department of Agriculture. It was used as a caretaker’s cottage up until the early 1980s. Between 1906 and 1925, the caretakers provided cooked food for the lepers. In 1982, the hut was converted into the Island’s interpretation centre.
The hut was refurbished for the public to stay in very recently, being opened at the beginning of November 2018. You have to book to stay overnight, either going to the DOC website here, or calling into one of the DOC offices. A bunk costs $15 an night and there are 12 bunks in the hut.

Update: Though there are DOC hut rules there isn’t one about not brewing beer. https://www.nzherald.co.nz/nz/news/article.cfm?c_id=1&objectid=12219732

Click to see options for using the image
I’ll definitely be going back. Hopefully when no one else is there.

Swimmers’ beach

View of Lyttelton from the bunk room (each room has 6 bunks). Our house is behind the large white oil tanks on the left.

My phone doesn’t take great pictures, but there is a lot of native bird life on the island. This is a kereru (wood pigeon)

I love the way they have used branches in these shelves

My niece would love this rope swing, though it is a little tame for her.

Looking back to Lyttelton from the wharf at night.

The morning of my return to Lyttelton: a good time to paddle.